2 Apache Iceberg and the lakehouse
This chapter covers
- What is Apache’s Iceberg table format?
- The benefits of Apache Iceberg
- Components of an Apache Iceberg–based data lakehouse
Apache Iceberg is a community-driven table format that defines how large analytical datasets are organized, versioned, and accessed on a data lake. It doesn’t change how data is stored at the file level. Instead, it adds a standard metadata layer on top of files, typically stored in Apache Parquet, which lets collections of files be treated as coherent, relational tables while remaining on low-cost object storage. This chapter will explore the architecture and value of Apache Iceberg as an open table format for data lakehouses.
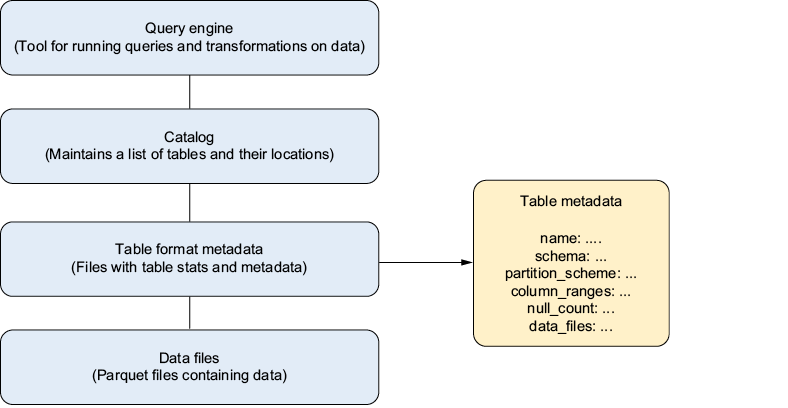
2.1 What does it mean that Iceberg is a table format?
A table format defines how data files, schemas, partitions, and snapshots are stored, so different engines can read the same dataset consistently. As shown in figure 2.1, it’s a logical wrapper around the data, combining physical files with metadata. That metadata supports efficient discovery, pruning, and versioning, much like a library index enables fast lookup without reading every page.
Figure 2.1 Table formats let data lakehouses store data warehouse-like tables on the data lake with ACID guarantees, so the data lake can function like a data warehouse.