Appendix. Creating the Adventure Works project
This walkthrough shows how to create an ASP.NET web project in Visual Studio 2005. This web project forms the basis for building the web portal that is referred to throughout the book. The tasks that are illustrated in this walkthrough include
- Creating a new web project
- Referencing an Assembly which contains data access logic
- Configuring the application
- Implementing a Master Page
- Creating a Theme
Note
All the files for the completed version of this project can be found in the chapter 2 section of the resources website at www.manning.com/neimke. Feel free to copy the source files from there to save yourself some typing.
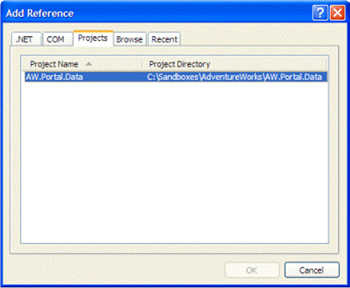
Open Visual Studio 2005 and create a C# web project named AdventureWorksWeb and save it to a convenient location in your filesystem such as C:\Sandboxes\AdventureWorks. Once the project has been created, add a reference to the AW.WebParts.Data assembly that we created in chapter 1. To do this, right-click on the project folder and choose Add Reference; this will launch the Add Reference dialog as shown in figure A.1.