In this chapter, you will learn how to connect and configure the main hardware and software components used for the robots in this book. Once the hardware and software are set up, we’ll get straight into interacting with the hardware using Python by reading sensor data from the onboard touch sensors. Then, you will learn how to control the Neopixel lights and a DC motor. Finally, all these different hardware components and Python scripts will come together to create a robotics program that controls the Neopixel and DC motors based on touch sensor input.
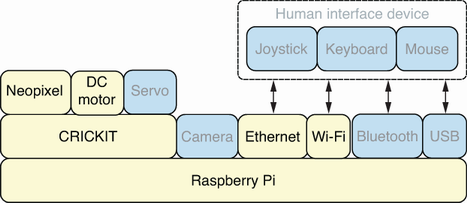
Figure 2.1 shows the hardware stack discussed in the previous chapter, with the specific components used in this chapter highlighted in the boxes with darker text. The components with grayed-out text will be used in later chapters.