This chapter will teach you how to create a custom interactive REPL (read–evaluate–print loop) robot shell. Shells provide a powerful interactive interface that enables direct interaction with software or, in this case, robotic hardware. They are a tried-and-true method for user interaction, and the Python standard library provides a built-in functionality to create custom shells. The chapter starts with a simple robotic shell and then progresses to add more movement functions with more customized options. The chapter ends by showing how a set of commands can be saved and run in one go in the shell, as is done in many other shells.
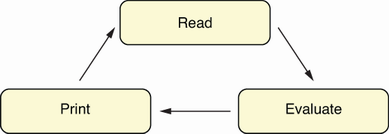
A REPL or command-line shell is a program that loops endlessly, waiting to receive user input, which is then taken and executed, and the output is printed as needed. They are also called line-oriented command interpreters because they take commands as a line of user input and interpret or execute the given line. Figure 4.1 illustrates the three states that a REPL goes through.