appendix B Building a custom IoT sensor
Sometimes the exact sensor you need isn’t available off the shelf or in the right configuration. For example, you might need to combine temperature, humidity, and soil moisture in a single affordable unit. I needed to correlate soil moisture with ambient humidity to understand how indoor plants affect the home climate. No commercial sensor offered this combination affordably, so I built one.
B.1 Hardware
To build the environmental monitoring node used throughout this appendix, you’ll need an ESP32 development board, a temperature and humidity sensor, a soil moisture sensor, and a few basic prototyping components. The total cost is typically under US$25, depending on your supplier and location:
- ESP32 development board (for example, a WROOM 32E board)
- DHT22 temperature/humidity sensor
- Capacitive soil moisture sensor
- Miscellaneous components: 10 kW pull-up resistor, wires, breadboard
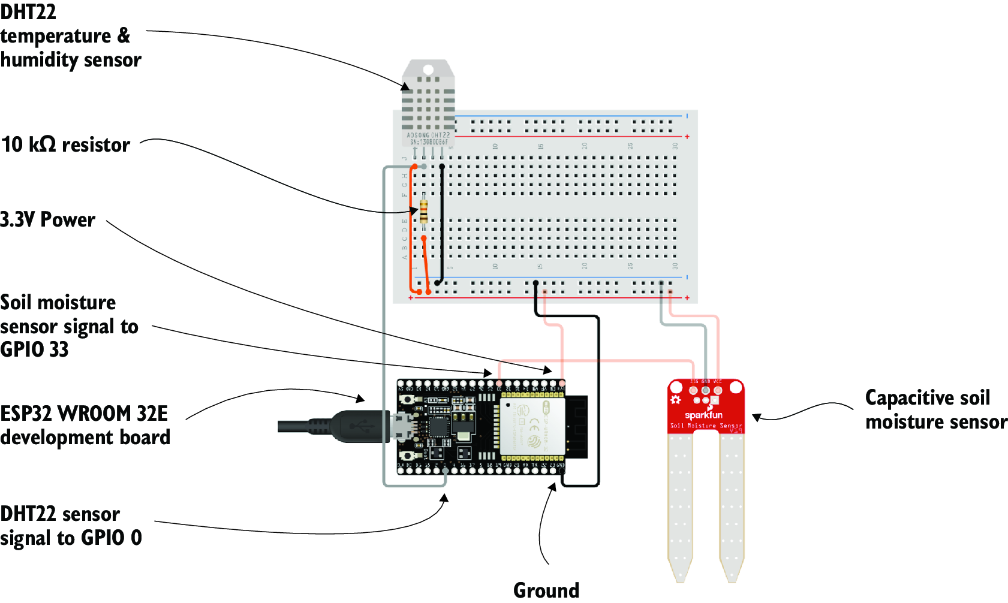
Figure B.1 shows the wiring for the environmental monitoring node. The DHT22 data pin is connected to ESP32 pin GPIO 0 through a 10 kW pull-up resistor, while the soil moisture sensor output is connected to GPIO 33, one of the ESP32’s analog input pins (ADC1). Both sensors are powered from the ESP32’s 3.3 V and ground connections.
Figure B.1 Sensor circuit design
B.2 Cloud configuration
Before writing the device code, configure AWS IoT Core so your device can securely publish readings.