Chapter 12. Building for the device and the App Store
This chapter covers
- Installing your app on an iPhone
- Distributing an app to others for testing
- Submitting your app to the App Store
This is exciting! You’ve written a polished program that runs efficiently and is free of bugs. But although the simulator is great, it’s no substitute for using your program on an actual phone. For example, there are some things like the GPS that you can’t test well in the simulator. This chapter will explain how to install your app on your phone and distribute it to others for testing. It will also lead you to the Holy Grail: submitting your app to the Apple App Store.

The first step in installing your app on an actual device is getting a developer certificate. Developer certificates are encrypted files that act like IDs. They allow Apple, Xcode, and iOS devices to know that you are who you say you are and that your program was written by you. To test your app on the simulator, you only need a free Apple developer account; but in order to install your app on an iPhone, you’ll need to join the iOS Developer Program to get a developer certificate. Membership in the program is $99 and can be purchased through Apple’s website: https://developer.apple.com/programs/ios/. You may have to wait up to two days for an activation email from Apple.

After activating your developer account, you need to take a series of steps to install your developer certificate. These steps are all designed to verify your identity with Apple. It sounds like an Abbott and Costello routine, but you’ll download and install an intermediate certificate to generate a certificate request so you can download and install your developer certificate which is needed to install a provisioning profile certificate.
The first step in this crazy sequence is to log on to the iOS Dev Center (https://developer.apple.com/devcenter/ios) and go to the iOS Provisioning Portal. In the portal, click Certificate and then download the WWDR Intermediate Certificate. Once it’s downloaded, double-click the WWDR certificate file to install it in your Keychain.

The next step is to create a certificate signing request. If it isn’t already open, launch Keychain Access, found in the Applications > Utilities folder on your Mac.

In Keychain Access, go to Keychain Access > Preferences, and select the Certificates tab. Set both options to Off.

Next, select Keychain Access > Certificate Assistant > Request a Certificate from a Certificate Authority. Enter your email address and name exactly as you did when you signed up for the developer program. Leave the CA Email Address field blank, select Saved to Disk, and select Let Me Specify Key Pair Information.


Click the Continue button, and save the certificate to your desktop. When prompted for Key Pair Information, choose a key size of 2048 bits and the RSA encryption algorithm.

Finally, return to the Certificate section of the portal and click the Request Certificate button. The page that loads is a bit confusing. It looks like nothing more than instructions for what you just did. But if you look carefully at the bottom of the page, there are two easy-to-overlook buttons. Click Choose File, and select the certificate signing request you created and saved with Keychain Access. Next, click Submit, and the certificate request will appear in the portal with a status of Pending Approval.

You’re halfway there. As an individual developer, you should receive an email notifying you that a certificate request requires your approval. But you don’t have to wait for the email to arrive in your inbox—just reload the page in your web browser, and click the Approve button. Download the certificate, and double-click the certificate file to add it to your keychain. If Keychain Access gives you an error message, something like Error: 100013, try quitting the program and doubleclicking the .cer file while Keychain Access is closed. It will work the second time.
You downloaded the intermediate certificate so you could upload the certificate request so you could download the developer certificate. Who’s on first, What is on second, and I Don’t Know is on third. The bases are loaded, and you’re ready to begin provisioning.

Provisioning you device is a fancy way of saying “getting your phone ready to install your apps.” When you provision, you create a profile that tells Xcode which test phones are allowed to run your apps. Like installing the developer certificate, a number of steps are involved to provision a phone. Fortunately, the iOS Provisioning Portal provides a Provisioning Assistant to help you through the task. Click Home, just above the Certificates link. Then click the Launch Assistant button at the bottom of the screen.


Click Continue, choose Create a New App ID, and click Continue again.

Choose a name for the provisioning profile that has meaning to you. It doesn’t have to be the same as the name of your project. Click Continue, select Assign a New Apple Device, and click Continue again.
When the assistant asks for a Device Description, enter a name for your phone that you’ll recognize, like My iPhone.

The assistant also asks you to enter your phone’s Unique Device ID (UDID). This isn’t your phone’s serial number. You can look up the UDID through Xcode. To do so, connect your iPhone to your computer, and launch Xcode. Go to Window > Organizer, and click the Devices tab. Your phone should appear at left in the window, under Devices. Right-click (or Ctrl-click) the phone, and select Copy Device Identifier.

Return to the Provisioning Assistant, click in the Device ID text field, and select Edit > Paste to paste in your phone’s UDID. Click Continue, and then click it again in the next window. Give your profile a description, and click Generate. Click Continue, and then download the newly generated provisioning profile to your Mac. Double-click the file, and the profile will appear in the Xcode Organizer. (Warning: The assistant tells you to drag the Provisioning Profile into the Organizer window in Xcode. This doesn’t work, although you can drag the file to the Xcode icon in the dock as pictured in the assistant.)


Now that you’ve downloaded and installed your developer certificate and a provisioning profile, you have everything you need to place your program on your phone. With your iPhone connected to the computer, all you have to do is open your project and select your iPhone as the build target.

Now, when you run your program, Xcode will install and launch the app on the iPhone instead of the simulator. Be patient: depending on the size of the program, it may take a while to load. But once it does, your app is installed on your phone! When the phone is connected to your computer, you can run the program on the phone from Xcode and use the debugger just as you did with the simulator. Even better, you can disconnect your phone from the computer, and the application will remain installed. The provisioning profile is good for a year. For one year, your app will work just like an app from the App Store. When the year is over, the app will need to be reinstalled if you want to continue using it.

Question: What is better than installing your app on your iPhone? Answer: Installing your app on your friends’ iPhones! It’s important to thoroughly test your app before you submit it to the App Store. This means other people, who aren’t developers, need to use the program too. Apple allows you to install your app on other peoples devices using a method called ad hoc distribution.
In order for your app to run on testers’ phones, it must be compiled with a provisioning profile that contains their UDID. If your testers don’t have Xcode, they can also use iTunes to discover their UDID. Here’s how. Launch iTunes, and connect the iPhone. Select the iPhone in the Devices list at left. If it isn’t already selected, click the Summary tab at the top of the window. Click the iPhone’s serial number, and the UDID will become visible. Now choose Edit > Copy or press Cmd-C. Doing so copies the UDID to the clipboard even though it didn’t appear to be selected. Have your testers follow these steps to look up their UDIDs in iTunes and then send you the UDIDs via email.


Return to the iOS Provisioning Portal, and click Devices. For each iPhone on which you want to install your app, click Add Devices, and enter a name and the phone’s UDID. You can add multiple devices by clicking the + button before you click Submit, but be sure to click Submit when you’re finished.

Click Provisioning, and click the New Profile button. Choose a profile name (Ad Hoc sounds good), make sure your name is selected in the Certificates section, select an App ID (it can be the same one you used before), and select the phones to which you wish to distribute your program. Hint: you can click Select All if you want to distribute the app to all the UDIDs you already entered. Click Submit, and you’ll see your new Provisioning Profile with a pending status. Refresh your browser, and click Download to download your profile. Double-click the downloaded profile to install it in Xcode.

Return to Xcode, select your project, and select the project name under Targets. Scroll down to the Entitlements section. Entitlements are an app’s way of requesting permission to do certain things. By default, Xcode requests extra entitlements that you don’t need. Removing these entitlements makes it easier to distribute your program. To remove the extra entitlements, select Enable Entitlements, but click the minus signs to remove iCloud Containers and Keychain Access Groups. Also delete the text in the iCloud Key-Value Store text field.

The next step is to compile an archive that you can distribute to your testers. Select iOS Device as your target using the Scheme menu next to Xcode’s Run and Stop buttons, and then choose Product > Archive. Your program will compile, and the Archive tab of the Organizer window will open. Select your program, and click the Share button. Choose iOS App Store Package (.ipa), and make sure the Ad Hoc provisioning profile is selected. Click Next, and save your IPA file.
Your app can now be distributed to any of the phones listed in the provisioning profile. Send your testers the IPA file you just saved. Have each tester launch iTunes and connect their iPhone to their computer. They should then drag the IPA file into iTunes. That’s it! The tester can then sync their iPhone, and your app will be installed on it.
Congratulations! You’ve finally done it. You’ve written a great program, debugged it in the simulator, and distributed it to testers, and now you’re ready to submit the program to the App Store. This is the moment you’ve been waiting for, the big kahuna. You just need to get all your ducks in a row for the App Store.

The internet is rife with horror stories about great apps being rejected from the App Store for no reason. Fortunately, real life is a lot less scary than The Walking Dead. Most apps that are rejected are refused for easily avoided issues. First, make sure your app is bug free. It shouldn’t crash, freeze, or have memory leaks. Any of these problems will result in rejection—and you learned how to fix all of them in the last chapter. Your program shouldn’t have any partially implemented functionality. For example, don’t have grayed-out buttons that pop up a Coming Soon message in an alert box.

Finally, don’t run afoul of any Apple rules outlined in the App Store review guidelines. To view the guidelines, log in to your dev account and visit http://mng.bz/s9bT. Most of these guidelines are common sense, but there are some hidden nuggets that are worth discovering. For example, if your application needs the internet. Although it may seem tedious, reading the guidelines will save you time in the long run.
You need to check a number of details related to your project’s configuration before submitting the app to the App Store. Examine the iOS Application Target settings, and make sure they’re correct. To do so, select your project in the Project Navigator and click the project name under Targets.

Set the Identifier. It can be any unique string, but if you have your own internet domain, the convention is to use your address in reverse DNS format starting with com: for example, com.yourDomain.yourApp. Pay special attention to the Version Number. Apple will reject apps with version numbers less than 1.0. If your app is already in the App Store, the version number must exceed the number already in the store.
Apps submitted to the App Store are required to have icons and launch images. If you didn’t do so already, add them to your app as outlined in chapter 5. Be sure to set Supported Device Orientations if your app can be rotated.
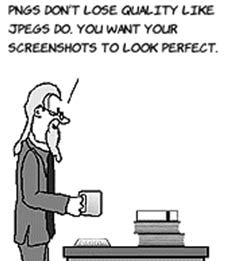
The App Store requires the developer to submit a number of items before an app will be considered for approval. These are the images and text that appear on your app’s page in the store. It’s helpful to gather the necessary files before beginning the application process. In addition to the icons included in your application, you’ll need a 1024 x 1024 pixel app icon and screenshots. The easiest way to create screenshots is with the simulator. While your app is running, select File > Save Screen Shot. Apple requires screenshots to be of retinal resolution. If the status bar is visible in your application, it should be cropped out of the screenshots. Screenshots should be 640 x 920, or 640 x 960 if the app covers the status bar. You’re allowed to submit images in a variety of image formats, but PNGs are probably the best option.
In addition to the graphics, you’ll need to have an application name, a description, and a list of comma-delimited keywords. The description should reflect the functionality of your application and not reference the names of competing apps. The description can be up to 4,000 characters long, but Apple recommends descriptions shorter than 600 characters. The keywords should be accurate. Violating these guidelines in an attempt at search-engine optimization is grounds for an App Store rejection. The App Store will also ask for a URL for product information and a customer-support email, so it’s good to have a public email address and at least one web page ready (even if it’s just a blog).

The first time you try to submit an app, you’ll be asked for a company name. This company name will appear in the App Store. It doesn’t have to be an actual corporation, but choose the name wisely: this company name will be used for all your apps, and once you choose a company name, you can’t change it.
Take some time to polish the icons, screenshots, app name, and description. These are the elements that make a first impression. In addition, once your app is approved, they can’t be changed without submitting a new application version; so take a breath and get these things right.

Now that you have everything you need, you’re ready to submit your app to the App Store. Submissions are handled through iTunes Connect (http://itunesconnect.apple.com). Log in to iTunes Connect with your developer ID and password. If you plan to charge for your app, go to the Contracts, Tax, and Banking section and request, read, and submit the requisite contracts. You’ll also have to add tax, bank, and contact information (even if the contact info is the same as your developer account).

Click Manage Your Applications and then Add New Application. If this is your first time adding an app, you’re asked for your company name.

Click Continue, and then enter the language, the app name, and a SKU number. The SKU number is a code that Apple will use to report sales to you. Despite the fact that it’s called a number, you can pick anything you want for the SKU, including letters. You may want to use an abbreviated app name with the version number. Also select the Bundle ID you’re using to provision your app.

After you name your app, you need to pick an availability date. This is the date your app will appear in the App Store once it’s approved. Approval usually takes only a week, but if your app happens to be approved after the availability date, then the app will appear in the App Store immediately upon approval. Many developers like to time app availability with publicity. To maintain control, they pick an availability date more than a year in the future; then, when the app is approved, they choose a real availability date.

Apple requires that you choose your app’s price in a fixed tier. You can choose from 88 pricing tiers with prices between free and $999.00. Click View Pricing Matrix to see how the different tiers correspond to actual app prices. Unlike much of the app information, which can only be changed when you submit a new version to the store, the price can be changed at will.

The next page asks for version information. The version number should match the version number you set in Xcode. For the copyright, enter the year and your full name. You’re required to fill out the Rating section to rate your app for violence and mature themes even if the app contains nothing remotely suggestive.


Now you can use the materials you gathered in the last section. Enter the description, keywords, email address, and URL. Upload your icon and screenshots. When you’re finished, be sure to click the Save button at lower right. Phew! You’re ready to upload the app.

Click View Details under your app icon.
Then, in the upper-right corner of the next window, click Ready to Upload Binary, and answer when you’re asked whether your application uses encryption (which is related to the USA export restrictions). Click Continue.

The actual uploading of your app is done though Xcode and not through the iTunes Connect website. Return to Xcode, and open your project. Choose iOS Device as the target.


Change Build Configuration to Release.


Choose Product > Archive. Xcode will build a release version of your application, and it should automatically open the Archives tab of the Organizer. If not already selected, select the archive you just built and click Validate. If your app validates without any errors—drumroll please—click Submit.

Now comes the hardest part of the process: waiting for approval. Assuming all goes well, Apple should approve your app in under a week.
You’ve installed your app on your phone and distributed it to friends and testers using ad-hoc distribution. You have an iTunes Connect account, and you know how to place apps in the iTunes App Store. It was a long haul, but you did it! You’re officially a full-fledged iOS developer.