Chapter 6. Working with databases and table views
This chapter covers
- Storing and getting data
- Using data in table views
- Navigating view hierarchies
- Changing data model
You’re nearly done with FlashCards. So far, you have applied modelview-controller (MVC) to design a complex app. Then, you learned how to use Interface Builder to draw views and Xcode to code classes. Finally, you added icons, image buttons, backgrounds, and animations to polish up your app.
Next, you’ll learn how to store and fetch data so you can track results. Then your users can see how they have progressed at learning state capitals.

The purpose of the FlashCards app is to help people remember facts. Whether you’re trying to learn college football mascots, celebrity couples, dog breeds, or multiplication tables, it won’t matter much if you don’t improve. To help your users know how well they’re doing, you need to keep track of their results.

The best way to figure out what information to store is to think about what users will want to see later. If you’re using FlashCards to learn something, you at least want to know how long the game took you and when you played.


If you know that, you can sum up the number of cards you got right and figure out a percentage of the total, so there’s no need to keep track of that separately. Notice that for cards, you don’t need to store the date again, because you’re storing which game the card result was associated with.
This is the minimum data you need to keep track of in order to provide some historical information. It’s also data that you already know or can get easily. The next step is to figure out how to show it.
To use this data in your app, you’ll need to add more views and ways to navigate to them. In iPhone apps, the normal way is to use a hierarchical navigation through tables. You’ve seen this in the Contacts app, the Mail app, iTunes, and many other iPhone apps. This is a common iPhone user interface, and as you’d suspect, a lot of it’s provided by the iOS SDK.
The first thing your app shows is a couple of buttons that let the user choose to see states or capitals. Let’s add a button to show history as well.

Once you have that up, you’ll show a navigation bar at the top. It will have a title and a Done button. Underneath, you’ll put a table with a list of games, the date the user played, and how well they did. You’ll put a little arrow to the right of each game to indicate that the user can touch the row to see more information.

And if they touch a row, you’ll show the details of each card. On the Card History screen, you’ll have a back button to allow the user to go back to the Game History list.
You can try to fancy up that home screen on your own. Perhaps three square buttons arranged horizontally would look nicer. Remember, because you’re using stretchable images, you don’t have to worry about making new images if you change the button size.

With your screen sketches in place, you now have to think about what new classes you may need and how to update the ones you have. To keep track of historical results, you need classes that can hold the data you want to store. So, let’s make GameResult and CardResult classes. You’ll add the properties that you identified and link the classes together.

Because you’re adding a new button, you of course need to add an outlet for it in the FCViewController. If you want the button to do anything, you need an action as well, which you’ll call showHistory.

You’ll save games as soon as they’re finished. The FCResultViewController will take care of that for you by telling the FCGame to save itself.

To save its results, a FCGame creates a GameResult object and sets the object’s properties. Next, it creates a CardResult object for each card, sets that object’s properties, and adds the CardResult to the GameResult. At the end, the FCGame has to send a message to some object to save the GameResult. You don’t know how that will work yet, but you will soon.


To show the game result data, you’re going to use a table. Somehow, you need to load the data and fill the cells. You also need to detect when a row is touched.

When a row is touched, you’ll switch the view to show the related card results. It would be nice to not have to load data again and just pass it from the game-result view to the card-result view, so you’ll do that.

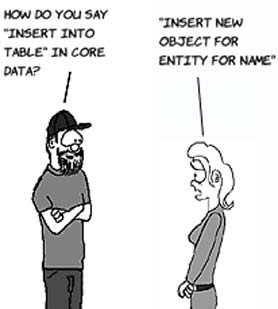
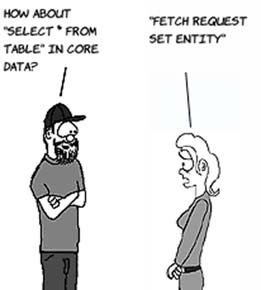
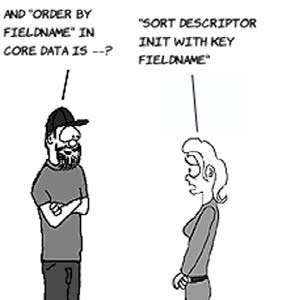
It seems like a lot, but you’ll see how much the SDK does for you. To help you store and fetch data, Apple provides a framework called Core Data. It makes storing objects easy. Underlying it is a standard SQL database, but don’t worry if you don’t know anything about those, because Core Data takes care of everything for you. If you know a lot about SQL, it will help you understand how Core Data works.

To help you store and get to objects later, you need to learn about the data-modeling tools built into Xcode. Using them, you can define what you want to store, generate classes automatically instead of coding them, and manage database updates that need to happen if you want to store things differently later.

To help you define your data, Xcode provides a design tool. You get to it by creating a new data model. Do this by right-clicking the Resources group and choosing New File. In the next dialog, in the iOS section, select Core Data and then choose Data Model.

Name the data model FlashCards .xcdatamodeld.

When you do this, Xcode displays a data-modeling interface for your .xcdatamodel file. Here’s where you can design your data.

Designing data for Core Data is similar to the class designing you’ve been doing, so it will feel familiar. It’s so similar that the classes you need in order to access the data can be automatically generated for you by Xcode. You’ll see how to do that next.

The first concept to understand in data modeling is the entity. An entity is roughly equivalent to a class in that it defines storage. Unlike a class, though, you don’t define messages for it.
To start, click the Add Entity plus sign at lower left in the editor, and then name the entity GameResult. Then, add two attributes, gameDate and gameLength, by clicking the plus sign in the Attribute table. When you’re done, it looks like this.

You need to configure each attribute. gameDate is a Date, and gameLength is the number of seconds the game took to play, so it’s an Integer. Click each one, and make the Attribute detail pane look like this.

You’ve probably already figured out that attributes are like properties when you’re designing classes. In the Data Modeler, they’re one of the types of data properties, with relationships being the other kind. We’ll get to those soon.

Let’s create the CardResult entity and its two attributes, cardName (a String), and wasCorrect (a Bool).

You’re almost done. If you remember from the beginning of the chapter, you need to associate the cards and games together. For that, Core Data provides relationships. Can you guess what thing from class design a relationship is most like?
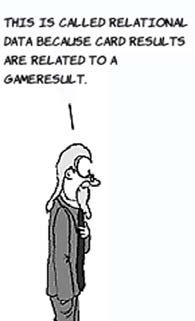
When two entities need to be associated with each other, you create a relationship between them. If you’re familiar with SQL and relational data, then you understand exactly what this means. If you aren’t, think of relationships the sane way you think of has-a in class design. A car has wheels, a game result has card results, and an album has tracks. Like has-a, there can be mutual, part-whole, and ownership relationships; one-to-one and one-to-many; and all the other things you learned about has-a.

Add a relationship to GameResult called cardResults. In the detail pane, set Destination to CardResult, select the To-Many Relationship check box, and set Delete Rule to Cascade. Then add a gameResults relationship to CardResult. This one isn’t to-many, and Destination should be set to GameResult. Now that you’ve created both, you can say that they’re the same relationship by using the Inverse drop-down in one relationship’s detail pane to choose the other relationship. When you do so, the editor automatically sets the other relationship’s Inverse value for you.

Your data model is finished. Next you’ll let Xcode do the coding for you. You can probably imagine the code you’d need to write to mimic this structure, because it’s similar to object-oriented design.
If you had to write the code yourself, it wouldn’t be too hard, but you’d have to remember to keep it up to date every time you made a change. Generating the code not only saves time but also is less prone to errors.
To do it, you must have the model up in Xcode. Right-click the Classes group, and choose New File. Under Core Data, choose NSManagedObject Subclass, and click Next.

In the next dialog, make sure all your entities are selected, and click Next to choose the group they will be stored in.

That’s it! As they used to say in the old iMac ads, “There is no step three.”
Go look at the new modules and headers that were generated. It’s mostly things you’re familiar with, plus a few we haven’t covered. If you examine the header, you’ll see that you already know a lot about how to use these classes.
For every app that needs Core Data, you have to go through a few steps. If you knew you were going to use data, you could have checked a box in the template to set up Core Data for you automatically. It’s good to know how to add it later yourself, so you know how.
The first step is to add the Core Data Framework to the Frameworks Group. To do that, click the FlashCards target at the top of the Project Navigator. Then, choose the Build Phases tab and open the Link Binary with Libraries table. Click the plus sign at lower left, and choose to add CoreData.framework.

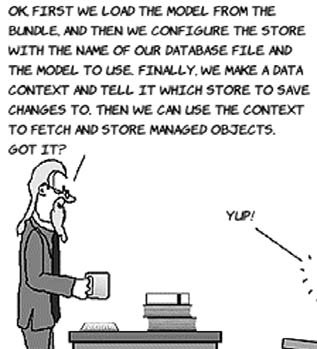
To load the model file and use the managed objects in your code, you need to configure Core Data in your app. To better understand how the code works, let’s look at some of the major concepts of Core Data and how they work together.

The first thing to understand is the object model. It’s created by Core Data from reading the .xcmodeldata file, and it gives you a way to find out about the entities, attributes, and relationships in your model.
Object Model
The object representation of the model data resource file.
The persistent store coordinator knows how your model becomes a database. iOS comes with a database called SQLite, and the store coordinator turns all your requests into SQL commands for it.
Persistent Store Coordinator
Manages the actual database file and writes the correct SQL based on your actions.
The object context keeps track of all your changes until they’re saved to the database. Every time you create a new entity object, it remembers that it needs to insert a row. When you change an attribute, the object context remembers to update the object context’s row. The object context also keeps track of objects you fetch from the store. When you’re ready to commit your changes, you send the object context a save message, and it tells the store coordinator what was changed.
Object Context
Keeps track of changes until they’re saved to the database.
Because you generated GameResult and CardResult, you know those are managed objects. If you look at their headers, you’ll see that they inherit from NSManagedObject.

Managed Objects
The type of objects created by generating classes from your data model
Let’s see how to code the configuration of these objects. In FCAppDelegate.h, add these retained properties:
@property (nonatomic, strong) NSPersistentStoreCoordinator *dataStore;
@property (nonatomic, strong) NSManagedObjectModel* dataModel;
@property (nonatomic, strong) NSManagedObjectContext* dataContext;
In any file in which you use Core Data, you need to add an import for it, so add this to the top of the header:
#import <CoreData/CoreData.h>
In FCAppDelegate.m, you need to create and configure these objects. This is a one-time thing, and it’s pretty much the same in all apps that use Core Data.
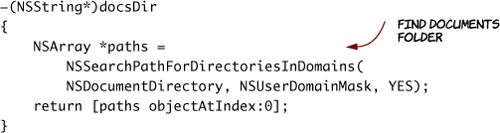
First, add this message to figure out where the Documents folder for this app is on the iPhone. This is where the database file should be stored:
Next, add this message to create a persistent store coordinator for a given model. The store coordinator builds the actual database from the entities, attributes, and relationships you defined, so it needs access to the model to do that.

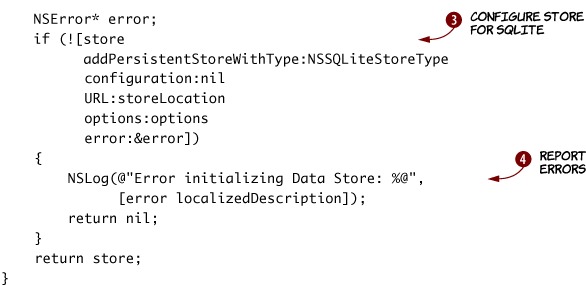

To create a store, you need to specify a location ![]() , options
, options ![]() , and the kind of database you want
, and the kind of database you want ![]() . We’ll explain the options we chose in section 6.4. Finally, many things in Core Data can go wrong, so you need to check for errors. In this case, you’re logging errors to the console so you can see the problem if you have one
. We’ll explain the options we chose in section 6.4. Finally, many things in Core Data can go wrong, so you need to check for errors. In this case, you’re logging errors to the console so you can see the problem if you have one ![]() .
.
The next step is to set up properties. Add this configureCoreData message, and make sure to call it.

First, you load the model file from the .xcdatamodel file in your bundle ![]() . Next, you use the message from earlier to make a store, and then you create a context
. Next, you use the message from earlier to make a store, and then you create a context ![]() . Because the context needs to issue changes to the store, you set that up as well. Finally, you configure Core Data when the app launches
. Because the context needs to issue changes to the store, you set that up as well. Finally, you configure Core Data when the app launches ![]() .
.

It’s a fair bit of code, but you can use it as is in just about any Core Data application. The only change you’d need to make is the name of the SQLite file. With that in place you can finally use your managed objects to create rows in the database.

With Core Data configured in your app, you’re ready to start using it. A big chunk of the work was done for you when you generated the model objects. And remember that big question mark you had when you were trying to figure out how to save game results? Well, now you know that’s going to be done by the data context.

To do the save, you need to add the code to the FCGame class. It will use Core Data, so add this import to the header:
#import <CoreData/CoreData.h>
Also declare the save message. You’ll have the controller tell you about the context when it requests a save:
-(NSError*)save:(NSManagedObjectContext *)context;
Finally, here’s the implementation for the save. Add #import "Game-Result.h" to the top of the module and then the following message.


This is typical Core Data code for creating entities. First you create a new GameResult object using its entity description ![]() . Next, you set the attributes of the GameResult
. Next, you set the attributes of the GameResult ![]() . Then you add CardResult objects that the Card will make for you
. Then you add CardResult objects that the Card will make for you ![]() , and finally you save
, and finally you save ![]() and report any errors you run into.
and report any errors you run into.
To get the gameLength, you needed to add another property to FCGame, called gameStart. It’s an NSDate*. To initialize it, set it to the current time by assigning it to [NSDate date] in FCGame’s init message.
Add this message to Card. You’ll also have to remember to declare it in the header and add #import "CardResult.h".
Listing 6.4. FCCard.m: creating a CardResult from a Card object
-(CardResult*)cardResultInGame:(GameResult*)gameResult
                   withContext:(NSManagedObjectContext*) context
{
    CardResult* cardResult = [NSEntityDescription
                    insertNewObjectForEntityForName:@"CardResult"
                    inManagedObjectContext:context];
    cardResult.cardName = self.cardText;
    cardResult.wasCorrect = [NSNumber numberWithBool: self.isCorrect];

    return cardResult;
}
This code creates a managed object and configures it. Because you set up an inverse relationship in the model, Core Data will automatically set the CardResult’s gameResult property for you when you add it to GameResult.
To call these messages, add this message to FCResultViewController.m.

Also add a [self saveGame]; call to its init method, so the game length is recorded as soon as you’re done.
With this code in place, each game will be stored as soon as you’re done playing. That’s great, but why save the game result if you can’t do something with it later? One nice thing to do is to allow the user to navigate around and view their game result history, which you’ll learn about next.
It’s no use saving data if you’re never going to use it for anything. The easiest thing to do with data is to look at it, and the iPhone provides a nice way to do that with table and navigation views. They’re perfect for quickly scrolling through data, choosing rows to get more detail on, and navigating back to the summary. This combination of views is used in a lot of iPhone apps.

If you look at the Contacts or Mail app, you’re looking at table and navigation views in action. The top bar is the navigation, and the list of data below it is the table. You’ll see this basic structure in a lot of apps, sometimes configured a little differently, but fundamentally the same. These views can be used with or without Core Data.
To get started, add a new view controller class to your app.

This time, make it a UITableViewController subclass. Name it FCGameHistoryViewController.m.

Before we look at the code, at right you can see how the tables and Core Data work together.

To start with, your controller will fetch the data into the context using a new class called a NSFetchedResults controller ![]() ,
, ![]() . This class is designed to help you put data from Core Data into tables. The context takes your request and creates managed objects for you
. This class is designed to help you put data from Core Data into tables. The context takes your request and creates managed objects for you ![]() .
.
Later, the table view will ask for that data like this:

First, the table view asks its controller how many rows it should show ![]() . To find out, the controller asks the fetched results controller
. To find out, the controller asks the fetched results controller ![]() how many managed objects it has. Then the table asks for each row in turn
how many managed objects it has. Then the table asks for each row in turn ![]() , which the controller gets by obtaining managed objects from the fetched results
, which the controller gets by obtaining managed objects from the fetched results ![]() . The last thing you need to do
. The last thing you need to do ![]() is format the properties to look nice in the table. Let’s see the code.
is format the properties to look nice in the table. Let’s see the code.
Change FCGameHistoryViewController.h to look like this.

To use an NSFetchedResultsController, you add a property ![]() and make a delegate
and make a delegate ![]() . Let’s take a closer look at how the delegate works.
. Let’s take a closer look at how the delegate works.

When an SDK class like NSFetchedResultsController needs to use a class it can’t possibly know about (like your FCGameHistoryViewController), it defines a delegate that acts as a definition of what messages it would like to send. To receive them, you implement the messages of the delegate. It’s a similar concept to inheritance, with the major difference being that there are no default message implementations. In Objective-C, this is called implementing a protocol, and we’ll diagram that with the ball-and-socket style used earlier.

Let’s go to the module file and load data. The first step is to build a request. To make a request, you say what entities you want, which ones, and how to sort them. Here’s the code.

This code makes an NSFetchRequest object that can be used to get NSManagedObjects into your context. First ![]() it builds an NSEntityDescription to say you want GameResult objects. Next
it builds an NSEntityDescription to say you want GameResult objects. Next ![]() it builds an NSSortDescriptor to say it wants them sorted by the attribute gameDate in descending order. You’ll use this message in loadData like this.
it builds an NSSortDescriptor to say it wants them sorted by the attribute gameDate in descending order. You’ll use this message in loadData like this.

loadData uses Core Data, so you need to get the data context from the app delegate ![]() (so you’ll need to import FCAppDelegate.h). Next you get the request object and use it to fetch
(so you’ll need to import FCAppDelegate.h). Next you get the request object and use it to fetch ![]() managed objects into your fetched-results controller, and set its delegate
managed objects into your fetched-results controller, and set its delegate ![]() to the view controller. Finally, you need to handle any errors
to the view controller. Finally, you need to handle any errors ![]() .
.

To get GameResults, you call loadData in viewDidLoad. viewDidLoad also needs to add a Done button to the navigation bar and set up its action, doneWithHistory. Here’s how.

The doneWithHistory action needs to remove this view from the window to reveal the home screen. In chapter 5, you made a message pushView to animate views sliding in from the right. Go make another message called popView that moves views in from the left, which you’ll call to make the transition smooth ![]() .
.
In viewDidLoad, you set the title and Done button ![]() and load the data.
and load the data.

Your view controller has all the data but isn’t using it yet. To do that, you need to implement three messages that the table view will send you, as shown here.

First the table will ask you how many sections you have. For each section, it will ask you how many rows are in that section. Luckily, NSFetchedResultsController knows this, so you just need to forward that request:
- (NSInteger)numberOfSectionsInTableView:(UITableView *)tableView
{
    return [[self.resultsController sections] count];
}

- (NSInteger)tableView:(UITableView *)tableView
     numberOfRowsInSection:(NSInteger)section
{
    return [[[self.resultsController sections] objectAtIndex:section]
            numberOfObjects];
}
Once the table view knows how many cells there are, it will begin asking for them. The fetched-results controller has the data you need to make the cell, so the first step is to configure UITableViewCell objects from GameResults (don’t forget to add #import "GameResult.h").

First ![]() you get the right GameResult for the section and row you’re in. Then you format the date and length
you get the right GameResult for the section and row you’re in. Then you format the date and length ![]() and use them for the labels inside the cell.
and use them for the labels inside the cell.
You’ll use this message to fill cells when the table view sends you the following message.

This message is supposed to provide cells for your table, and it’s called a lot. To make this as fast as possible, the best practice is to share those cell objects. To make that easier, the SDK provides a way to get cells from previous calls ![]() , and if it’s the first message call, you make a cell with the common attributes. The cells have a title and subtitle and an indicator that more detail is available
, and if it’s the first message call, you make a cell with the common attributes. The cells have a title and subtitle and an indicator that more detail is available ![]() . Once you have a cell, you need to fill it
. Once you have a cell, you need to fill it ![]() .
.

The last step is to add a button to the home screen and make it bring up this view. You know how to do most of this, so follow these steps:
- Add a button to FCViewController.xib like the ones you have there already.
- Make an outlet called showHistoryBtn, and connect it.
- Make an action called showHistory, and connect it.
- Update animateViewLoad with the new button.
- Update viewDidLoad with the new button.
Here’s the code to bring up the history inside a navigation controller.

This is like the code you used to bring up views before, but you need to put the view in a UINavigationController ![]() to automatically get titles and back buttons for the hierarchical navigation.
to automatically get titles and back buttons for the hierarchical navigation.
Run the game, and go to the history page to see something like this.

The disclosure indicators you added mean that if you touch the row, you should see some detail. But if you touch a row, nothing happens. You’ll add that next.
Once you know how to connect data to a table view, it’s pretty easy to do it again. You could go back to Core Data and this time get CardResult objects, but you don’t need to. Your model set up a relationship between GameResults and CardResults. This means that when you fetch a GameResult, the CardResults associated with it come along for the ride. Look at GameResult.h, and you’ll see that a property to access them has already been generated for you.

To use it, add a results property to FCCardHistoryViewController.h:
@property(strong, nonatomic) NSArray *results;
Now, implement the two section- and row-count messages:
- (NSInteger)numberOfSectionsInTableView:(UITableView *)tableView
{
    return 1;
}

- (NSInteger)tableView:(UITableView *)tableView
        numberOfRowsInSection:(NSInteger)section
{
    return [self.results count];
}
You only have one section with as many rows as are in the array.
Filling a cell works pretty much as it does for a GameResult. This time you’ll use color to make wrong answers stand out more.

And you send this message whenever you’re asked to provide a cell.
Listing 6.14. FCCardHistoryViewController.m: getting a cell for this row
- (UITableViewCell *)tableView:(UITableView *)tableView
         cellForRowAtIndexPath:(NSIndexPath *)indexPath
{
    static NSString *CellId = @"Cell";
    UITableViewCell *cell =
       [tableView dequeueReusableCellWithIdentifier:CellId];
    if (cell == nil) {
        cell = [[UITableViewCell alloc]
                 initWithStyle:UITableViewCellStyleSubtitle
                 reuseIdentifier:CellId];
    }
    [self fillCell:cell withResultAtIndexPath: indexPath];
    return cell;
}

This is also much as it is for GameResults. Again, you try to reuse cell objects to speed up table viewing.
When a GameResult is touched, you navigate to the card history. Add the following message to FCGameHistoryViewController.m.

First you load the view ![]() from the XIB file. Next
from the XIB file. Next ![]() you create a sort descriptor to sort the cards by their cardName property and apply it to the GameResult’s cardResults
you create a sort descriptor to sort the cards by their cardName property and apply it to the GameResult’s cardResults ![]() to get a sorted array of cards. Finally,
to get a sorted array of cards. Finally, ![]() you navigate to the card history view by handing FCCardHistoryViewController to the navigation controller.
you navigate to the card history view by handing FCCardHistoryViewController to the navigation controller.
Run the game, go to history, and touch a game result to see the related cards.
Phew. We covered a lot, but now have an app that stores data and fetches it later to show it in navigable table views. This pattern of interaction is common in iPhone apps and can be carried out with a fetched-results controller or arrays (and many other ways). The important thing is that you know how many rows you have and what’s in them.

There will come a time, though, when you want to change your data model. If you already have objects stored, then something has to be done to update them, or Core Data won’t understand how to read them. We’ve already covered part of what you need to do, and now you’ll learn the rest.

When you created your data model, you were teaching Core Data how to create a database for you. But you’re not likely to get it perfect the first time. Even if you do, you’ll probably want to keep adding features to your app, so you’ll need more entities, attributes, and relationships.

Once you have a stable version of your data model, you should create a version for Core Data to store no matter what changes you make. To do that, choose the data model in Xcode and choose Editor > Add Model Version from the menu. Doing so creates a version of your data model. Then click the parent data model (the .xcdatamodeld file), and set the new version as the current one.
The green check mark shows you the current version.


From now on, don’t ever change the original .xcdatamodel file. You can change the new one, but if you release it, you need to create a new version.

Now Core Data knows the versions of your model. If you tell it that you want automatic migration, it will make the updates of your database and data for you.
Versioning your model is absolutely necessary if you want Core Data to handle migrations for you. It’s important that you remember to add a new version after you release any model to the App Store, or your customers won’t be able to upgrade. Between released versions, you may want to add versions for convenience if you don’t want to delete test data.
You already told Core Data to do the migration for you. Remember this?
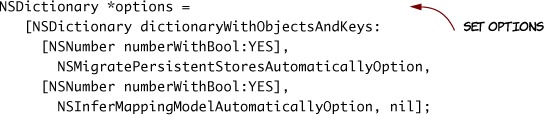
Those options tell Core Data to look at the version in your app’s document directory and, if it doesn’t match the latest version in the bundle, to automatically add or delete any entities, attributes, or relationships necessary to make the models match.
FlashCards now has enough features to launch into the App Store, but if you want to, you can let the user select a CardResult and see their past guesses. To do that, you need to add the attribute to CardResult, regenerate it, copy it from the Card, and then show it in a table view that you push into the navigator.
You’ve seen a few different ways to transition between views, but there is another popular one called a tabbed view. Using it, you can get to various parts of your app quickly without needing a hierarchical navigation. We’ll explore a new app that is based on this idea in the next couple of chapters.