Chapter 8. Moving, rotating, editing, and animating images
This chapter covers
- Animating image views
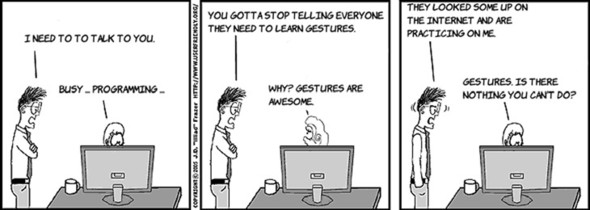
- Using gestures to manipulate images
- Compositing a new image
To start out, you kept Disguisey simple, but you can do much more to improve it. Before you can post it to the App Store, you need to polish it. If you’ve been playing around with it, the first thing you’ll notice is that it’s hard to position the mustache on the right part of the face. It would be great if you could move it around. Also, disguises don’t match all face sizes, so being able to resize the image would be nice, too.
You’re going to look at some of these problems and a few others. Spend a minute or so playing with Disguisey and thinking about the features you think it needs. We might not cover all of them here, but you should try to sketch, design, and code them yourself.
Improving any app is similar to writing it in the first place but can be a lot more fun. When you’re first building it, it takes a while to get a working app that does anything at all. But a lot of improvements require just small bits of extra code.
To start with, you learned in chapter 5 that iPhone apps use simple animations to make them come alive. There’s a definite feel to well-done apps, and it comes in part from good use of simple animations. Instead of plopping the mustache down on the face, how about you make it grow in place, as shown here.

That will look a lot better. You already know exactly how to do this, but we’ll go over the code soon.
Another improvement would be to use a touch-and-drag gesture to let the user move the disguises around. That would look as shown at right.
In the last chapter, you learned about how to access touch events, but it turns out there is an easy way to recognize common gestures. You’ll learn about that technique shortly.

While you’re at it, resizing disguises would also be nice. You can use the pinch gesture to do that.
Luckily, resizing a disguise is similar to moving it. The first changes the (x, y) position, and the second changes the scale.

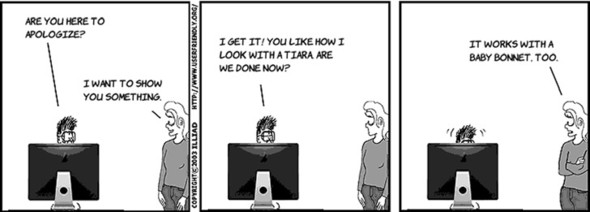
And because everyone makes mistakes (or changes their mind), you need a way to delete disguises. The normal way to get a menu of actions is to tap and hold the thing you want to change and then pop up a little menu.

Finally, it would be no fun at all to put mustaches on your friends if you couldn’t save the results. Let’s use a tap and hold on the face itself to pop up a Save menu, which will put a composited photo in your Photos app.

Did this list cover all your ideas? If not, we may get to them in later chapters. Even if we don’t, we’re sure you’ll figure them out. Sketch them now, and then try to create designs and code them up as you move along.
With your sketches in place, you can begin to plan your design. For each of these features, you need to figure out what parts should be handled by the views, the models, and the controllers. You’ll have new properties and messages, and you’ll also have to design new interactions between them.
Dragging an element has this simple effect on your state.

Similarly, pinching an element is simple to describe in this diagram.

The interaction and transitions for deleting are a little more complex, but not much.

And saving is pretty much the same as deleting.

That’s what needs to happen, so next you have to figure out which class does what. The Face View Controller is heavily involved, as you might suspect. You know that user interactions are orchestrated by the controller, and you’re doing everything on the face view. Here are some of the additional properties and messages you need to add.

You can see that a lot is happening there, and, of course, there will be helper messages that break these messages down a little.
The model classes have to keep track of a little more and need new messages.

Now that you want to change the disguise, you need ways to get the elements and then change them once you have them. And DIDisguiseElement keeps track of its scale in addition to its position and image.
With the changes organized into classes, it’s a lot easier to think about each message and what it will do. For some messages, particularly those in the model classes, you already know pretty much how to proceed. For others, you have to learn more about the iOS SDK to implement them. Take a minute and think about how to code each message, and what you think you need to learn in order to do it.

Let’s consider moving a disguise element. You’re storing the point in your model, and you’ve already used it to position the view’s center. You know that to move the element, you have to change x and y, as shown at right.

The only thing you don’t know is how to find out what xDiff and yDiff are. To do this, you need to get the initial touch point and track it while it moves. Along the way, you need to update the models and views so the disguise stays under the finger. This is called recognizing a pan gesture.

If you know the scale, you can apply it to the disguise element by multiplying it by the width and height. All you need to learn is how to recognize the pinch gesture.

Popping up the Delete menu involves a few new concepts.

The first one is recognizing the hold, or long press, gesture. But, you probably get the idea that once you learn one gesture, it will be simple to learn the others. The second part is making the pop-up menu, which is something you haven’t done.
The final thing you need to do is create the composite image. Like the delete, it starts with a menu, but then you need to overlay two UIImage objects into one by drawing the pixels of one onto the other.

This would be hard, but iOS comes with a library called Core Graphics that can do most of it for you. You need to know where to draw and how to scale, but the actual drawing is a simple message.
With these hints, you might want to see what you can do on your own. The rest of the chapter will take you step by step through the process of making these additions to Disguisey, but it might be fun to figure some of it out. The areas that you know already are the animation and most of the model class updates. The rest will require research.

In chapter 5, you learned that animation on the iPhone is simple. Just start an animation, change properties, and then commit the app. All the actual animation of the in-between states is taken care of for you. The trickiest part is coming up with how to use animations in the first place.
The only part of your user interface that needs an animation is the placement of the disguise element. There aren’t that many other transitions, except for tabs (which shouldn’t animate) and the image picker (which animates automatically). Here’s what you’ll do.
To make the mustache grow at the touch point, you want it to start with a small size, then have the height and width change to their final values, and finally move the top-left corner of the mustache so the center stays put. The changes are in the drawDisguiseElement:startingAtPoint: message, which you’ll see next.

You need to change the position and size of the UIImageView that has the disguise element to make it grow in place, but iOS makes it even easier. Each view has a bounds property, which is in the coordinate system of the view. This means the top-left is always (0, 0), and iOS will calculate the position of the image within its parent view by using the center. Because you don’t want the center to change, all you need to do is change the height and width of the bounds, and the top-left coordinates will be calculated for you.

Here’s how to change drawDisguseElement:startingAtPoint.

You start by setting the bounds to a rectangle with 0 for x, y, width, and height ![]() . Then you put an animation begin and end around the code that sets the bounds to the final value
. Then you put an animation begin and end around the code that sets the bounds to the final value ![]() . As you saw before, you can change how the animation looks by setting a few parameters.
. As you saw before, you can change how the animation looks by setting a few parameters.
To get ready for later, move the allocation of the disguise element to its own message:
-(UIImageView*) newDisguise:(UIImage*)image
{
    UIImageView* iv = [[UIImageView alloc] initWithImage:image];
    return iv;
}
Try it out by building and running the app with Cmd-R. Now, when you touch the face, you get a nice animation instead of the instant placement, which is jarring on the iPhone.
Speaking of touching the face, do you remember how you did that in the last chapter? You learned that if you inherit from UIImageView, you can implement touch messages to detect the tap. It’s not hard to recognize a tap this way, but imagine what a pain it would be to do something harder, like a pinch. Luckily, you don’t have to.
A lot of views, like buttons or tables, do all the work for you. They have built-in ways for you to interact with them. You don’t need to worry about touches or recognizing gestures. But if you have your own ideas for interaction, you have to do a little more. You could look at every touch and react to it, but some gestures are too complex for that.
There’s a set of gestures that are used so often, they are built in—not just to save you time, but also to make sure they acted the same in all apps. If they weren’t, you would have a lot of buggy pinch implementations in the App Store.
In the first few versions of iOS, developers had to recognize taps, pinches, pans, and holds. Because these are so common, you now have a whole set of classes to help you. They’re organized like this in the iOS SDK.
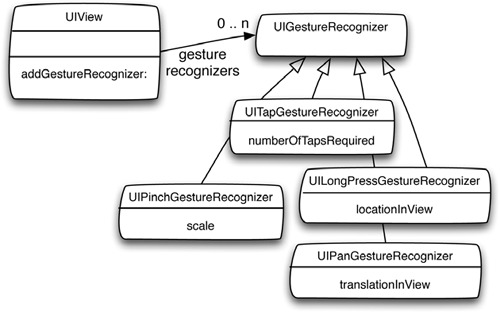
Each view can have a gesture recognizer object attached to it. To detect a tap or a series of taps, use UITapGestureRecognizer. For a hold, use a UILongPressGestureRecognizer. You can probably guess what to use to pinch and pan a view. Each gesture has different properties you use to set it up and get information from when the gesture is recognized.
Use the built-in apps as a guide to what users may expect these gestures to do. For example, use pinch to change the size of things. It might be fun to use them in other ways, but don’t do so in a way that confuses the user.
Gestures are so easy to use that you don’t need to think about independent touches any more. But because you know views receive these messages, let’s see how gestures work.
If a view has a gesture recognizer attached to it, the view will send the recognizer all the touch messages it receives.

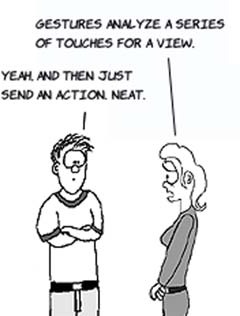
Each gesture class is responsible for analyzing these touches and deciding whether the series of touch events correlates to the kind of gesture it’s responsible for detecting. If so, it sends an action message that you set up.
Tap is easy to explain. Here’s what it looks like.

When you touch the view, the tap recognizer gets a touchesBegan message. It remembers the location and time, and if you let go at the same point (or close enough) within a certain time window, a tap action is sent to the controller that created the tab recognizer.
All you need to do is create the right recognizer, attach it, and set it up to call an action in your controller. Here’s the new code for the newDisguise message you added.

That’s all you need to do to detect these three new gestures on a disguise element. The one thing you haven’t seen before is how to connect actions with code instead of with Interface Builder. To do so, you use @selector to turn the name of the message into something you can pass as a parameter. The message needs to be defined on the targeted object, self, which is a DIFaceViewController.
Selector
A way of making it possible to pass a message to another message so it can be called later.
To finish, you need to implement the three actions. We’ll go through each of them next.
The first gesture you’ll implement is moving the disguise element. This gesture is called panning, because it’s often used to pan around large views. It works like this.

That’s all that needs to happen to see the disguises move around, but remember, you have model classes too. Here’s a more complete picture of what’s going on.

First the recognizer tells the controller that a move was detected. The controller sends messages to the recognizer to get the view and the amount the user’s finger moved. Then the controller sends a message to the Disguise object it holds to get the specific element associated with this view, and tells the element to move by the amount the recognizer gave the controller. Finally, the controller uses the element’s position property to set the new center of the disguise image view.
Here are the new messages for DIDisguiseElement:
-(void)translateByX:(CGFloat)xDiff y:(CGFloat)yDiff
{
    self.point= CGPointMake(self.point.x + xDiff, self.point.y + yDiff);
}
And here’s how you find the matching element in the DIDisguise class:
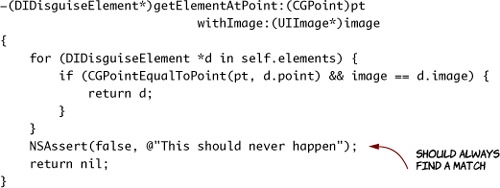
Declare this in the DIDisguise header. Note that if you can’t find a disguise element, that must mean you have a bug somewhere. NSAssert will alert you so you can fix it. Of course, it does this by crashing the app, so you want to be sure you find all problems in this area before releasing the app.
That takes care of the models. Now update FaceViewController.m with the following messages to orchestrate a move through the models and views.

To begin, you check to see if this gesture is starting or changing, because you want to ignore its other states. Next ![]() you get the view and pan distance (also known as the translation). Then
you get the view and pan distance (also known as the translation). Then ![]() you get the disguise element from the disguise, move it, and set the view’s center. Finally
you get the disguise element from the disguise, move it, and set the view’s center. Finally ![]() , you tell the recognizer that next time, you just want to know how much you moved from here.
, you tell the recognizer that next time, you just want to know how much you moved from here.
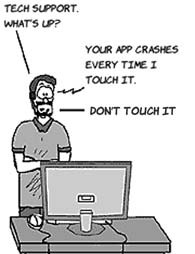
You can run the app, but be careful. You haven’t set up the other recognizers, so if they’re triggered, the app will crash. Until then, you’ll have to be happy that you can use the mustache to cover up bald spots or hide blemishes.
When you’re done, you can move on to pinching, which is, unsurprisingly, very similar.

Your disguises look great if they happen to be just the right size for the face photo you choose. Let’s make it possible to resize disguises when they don’t fit.
Like moving, pinching has this interaction.

So, the code is nearly the same, except that you are changing a scale instead of moving a position. To start, go into the DIDisguise element and add a new CGFloat property called scale. Then set it to 1.0 in the init message.

Add this message to the DisguiseElement module (declare it in the header, too):
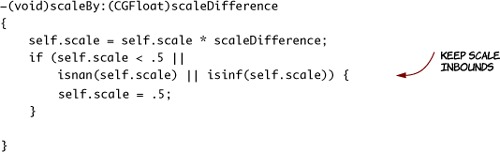
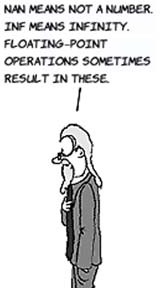
You do a check to make sure the scale keeps the mustaches big enough to be pinched. The functions isnan() and isinf() will tell you if you’re overflowing the numbers, so you can fix that too. If you’re curious, remove them later and see what happens.
Now you can implement the gesture in the Face View Controller.

The transform property of views allows you to change their size, rotation, and position with a matrix called an affine transform. You don’t need to know the math to use it, though. Just make one from the element’s scale, and use it.
Affine Transform
Try it with Cmd-R. The simulator can simulate a pinch if you hold down the Option key. Hold down Shift as well to move the pinch points away from the center. Obviously, when you get this over to the device, you can test it more thoroughly.
Recognizing gestures is pretty simple. You could easily implement the hold gesture if you knew how to pop up a menu. We’ll cover that next.
You’re going to make mistakes or change your mind about what disguises you want to use, so you need a way to delete them once you’ve aded them. In iPhone apps, one nice way to interact with a view is to hold it until a menu comes up. It’s similar in spirit to the right-click context menus in mouse-driven GUIs.

The object interactions are somewhat different for this case.

As before, you detect the gesture. This time, you have to pop up a menu to find out what to do. Once the user chooses to delete an element, you can tell the disguise object and then remove the view.
To make pop-up menus, you use the UIMenuController class. Creating a menu works like this.
First you create a UIMenuController. Then you add items, give the menu a target to point to, and make it visible. Each item has an action message associated with it, so when an item is chosen, the action is sent back to the controller, and the menu is released.

Let’s look at the code. First, let’s update the DIDisguise model. Here’s the implementation, but remember to declare the message in your header:
-(void)removeElement:(DIDisguiseElement*)el
{
    [self.elements removeObject:el];
}
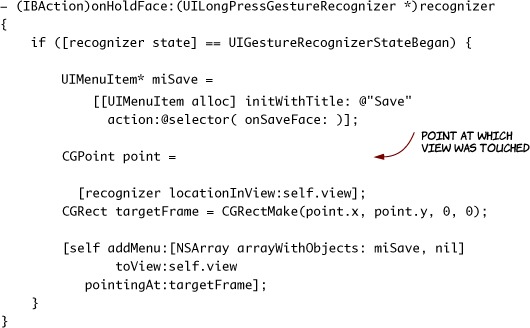
Now let’s recognize that gesture in the Face View Controller.

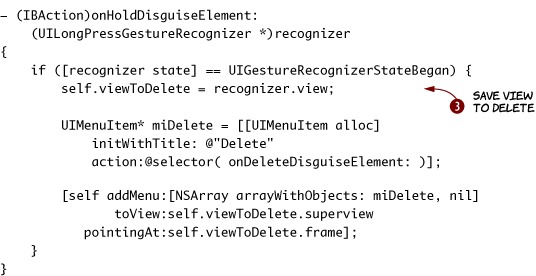
The first message, addMenu, makes it a little easier to make menus. First you get the menu ![]() and set its items based on the array you’ll make later. Then you point the menu at the thing you’ll be affecting
and set its items based on the array you’ll make later. Then you point the menu at the thing you’ll be affecting ![]() . If the touch is near the top of the phone, you put the menu below the finger pointing up at it; otherwise, you point down. Finally, you save the view
. If the touch is near the top of the phone, you put the menu below the finger pointing up at it; otherwise, you point down. Finally, you save the view ![]() in a new property called viewToDelete. This property is a strong UIImageView*, which you should add to the controller.
in a new property called viewToDelete. This property is a strong UIImageView*, which you should add to the controller.
Firstresponder
To use this message in the gesture action, you need to create an array of UIMenuItem objects. Even if you have only one, as in this case, you must use an array. Each item has some text to show and an action that you make with @selector as you did before.
You need to implement the onDeleteDisguise action with this code:
- (void) onDeleteDisguiseElement: (UIMenuController*) sender
{
    UIImageView* v = (UIImageView*)self.viewToDelete;
    if (v != nil) {
        DIDisguiseElement *el =
            [self.disguise getElementAtPoint:v.center
                                   withImage:v.image];
        [self.disguise removeElement:el];
        [v removeFromSuperview];
        self.viewToDelete = nil;
    }
}
If you run a test at this point, you’ll see that the app doesn’t work. What’s going on?
It turns out that you need to let the controller know that it has menus and that deleting is allowed. First, add this message to the Face View Controller:
-(BOOL) canBecomeFirstResponder
{
    return YES;
}
Now this controller can have menus. When the menu is requested, it asks the controller if the delete action is allowed. Here’s how you say yes:
-(BOOL) canPerformAction:(SEL)action withSender:(id)sender
{
    if (action == @selector(onDeleteDisguise:))
        return YES;
    return [super canPerformAction:action withSender:sender];
}
Tap the Delete menu to remove the disguise.
You can now use your elements pretty much however you like, but there’s no way to save your work.

To finish Disguisey, you need a way to save the final photo so you can access it later or share it with others. What good is making your friends look ridiculous if they don’t know about it?
To implement a save, you could add another button to the Navigation Bar or add a toolbar. Because you’ve been playing with pop-up menus, let’s use one for this, too.

You already know how to do ![]() ,
, ![]() , and
, and ![]() . First, add the following code to the controller’s viewDidLoad message to add the recognizer to the face image:
. First, add the following code to the controller’s viewDidLoad message to add the recognizer to the face image:
UIGestureRecognizer *hold =
    [[UILongPressGestureRecognizer alloc]
      initWithTarget:self
      action:@selector(onHoldFace:)];

[self.faceImage addGestureRecognizer:hold];
Don’t forget to allow the action by adding this to canPerformAction:
if (action == @selector(onSaveFace:))
    return YES;
When the hold is recognized, you handle it with this action:
If you run the app and hold the face, the menu comes up—but don’t tap it yet, unless you want Disguisey to crash. Without the onSaveFace message to call, you’re not finished. If you’re dying to save, take a screenshot.
When the Save menu is tapped, you need to take all the images for each disguise element and somehow draw them onto the face image, so you have one UIImage object at the end. Then you can easily put this image in the Photos app. How easily?
- (void) onSaveFace: (UIMenuController*) sender
{
    UIImage* face =
        [self.disguise overlayDisguisesOnFace:[faceImage image]];

    UIImageWriteToSavedPhotosAlbum(face, nil, nil, nil);
}
OK, that’s nice, but this only works if DIDisguise can overlay disguises. Add this message to Disguise, and don’t forget to declare it in Disguise’s header:
-(UIImage*) overlayDisguisesOnFace:(UIImage *)face
{
    UIImage *newFace = face;
    for (DIDisguiseElement *d in self.elements) {
        newFace = [d overlayOnFace:newFace];
    }
    return newFace;
}
See what you’re doing? You’re making each model class responsible for its part. DIDisguise is responsible for telling elements that they’re supposed to overlay, but elements do the heavy lifting. Here’s what’s happening.

The controller starts by requesting the overlay from the DIDisguise model class. In turn, it loops through each element in the disguise and sends the element a message to overlay itself. The result makes sure each object encapsulates the behavior that it should be responsible for.
To finish, add the following code to DIDisguiseElement’s module file.

The only hard part is seeing how to use the center and scale to find the destination rectangle for the disguise. Core Graphics handles resizing and drawing for you. This illustration will help.

The dashed box represents the size of the mustache on the screen after you scale it. To find this rectangle’s upper-left point, you need to subtract half the scaled width from the center point’s x-coordinate, and half the scaled height from the center’s y-coordinate.

But enough of this chit-chat. Let’s run it. After you save, tap the home button at the bottom of the simulator, and go to the Photos app to see the saved face. Your enhancements are finished, so go show a friend. Be sure to hide all your doctored photos of their face first.
You did a lot to make Disguisey better, and we hope we covered some of the ideas you came up with. Keep playing around with the app and see if you can figure out how to rotate an element, add another menu item to make a mustache wiggle, or add a new tab with jewelry and accessories.
Doing that last one is easy: all you need to do is create another XIB file, connect it to the Disguise View Controller, set it up in the app delegate, and add a new tab bar item for it in Interface Builder. Then, grab some pictures of earrings and add them to the tab. You already know how to do these things.
Later in the book, you’ll see how to access the internet so you can come back and send this photo to a friend or post it to a photo-sharing site.
If you have ideas but need some help to get started, don’t forget to visit the online forum associated with this book (www.manning.com/franco/).