Appendix B. Setting up and using GitHub Copilot
B.1 Setting up Copilot
To help us understand the process of setting up Copilot, let’s briefly discuss how the tool works. Since Copilot is reliant on GPT models that need to rapidly analyze our work and suggest code snippets, it requires a large amount of resources to respond quickly. Therefore, when using Copilot, we don’t install the AI system on our machines; instead, we install plugins that grant us the ability to send our snippets of work to Copilot for processing and to receive recommended code, as demonstrated in figure B.1.
Figure B.1 A flowchart demonstrating the connection between IDE, plugin, and Copilot
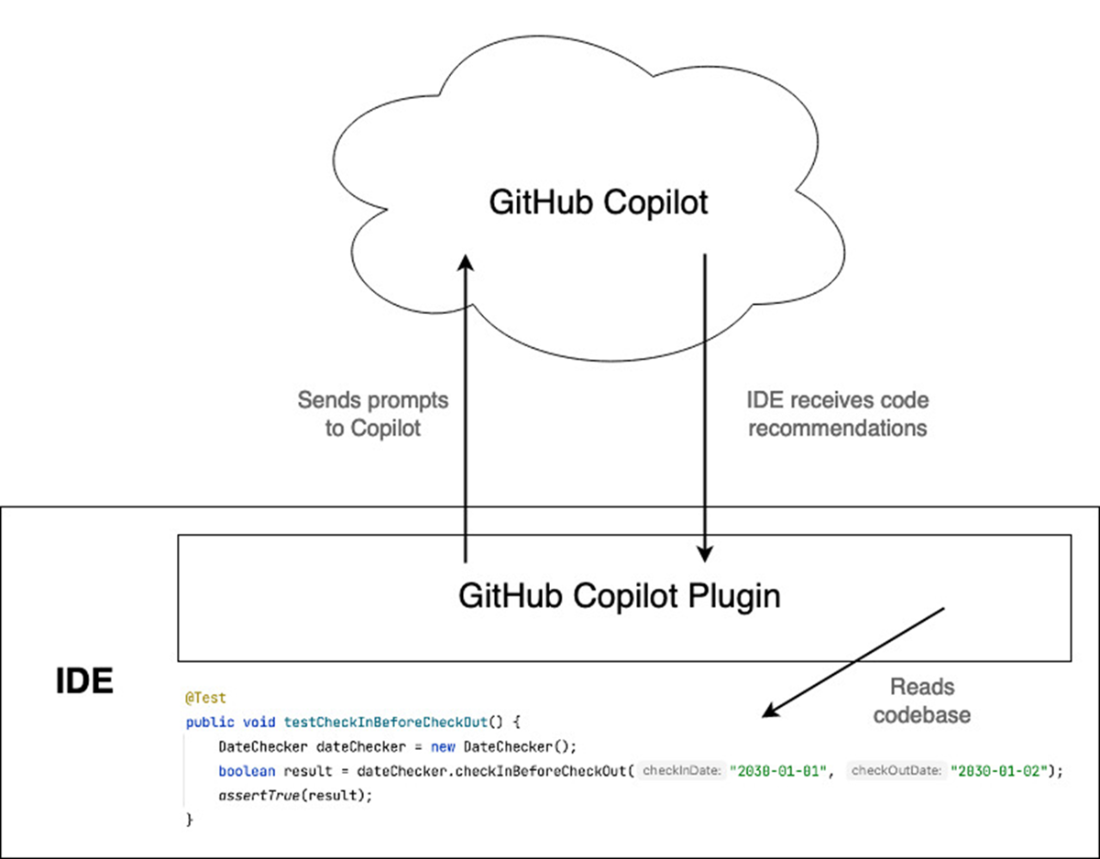
As the diagram demonstrates, we install a plugin into our IDE and grant it access so that the plugin can monitor what we’re typing, send it to Copilot, and then process and display Copilot’s recommendations. As a consequence of this structure, Copilot works with a range of IDEs, including JetBrains products, Visual Studio, VS Code, and more. For our example, we’ll use IntelliJ Community Edition, but the process in which we set up an IDE for Copilot is largely the same regardless of IDE choice.