6 Creating a profile card
This chapter covers
- CSS custom properties
- Creating a background using radial-gradient
- Setting image size
- Positioning elements using flexbox
In this chapter we will create a profile card. In web designs, cards are a visual element that contains information on a single topic. We are going to apply this concept to someone’s profile information, essentially creating a digital business card. This type of layout can often be seen on social media or blog sites to give readers a quick overview of who authored the content. It will sometimes have links to a detailed profile page or opportunities to interact with the person the profile belongs to.
By the end of the chapter, our profile card will look as follows (Figure 6.1):
Figure 6.1 Final Output
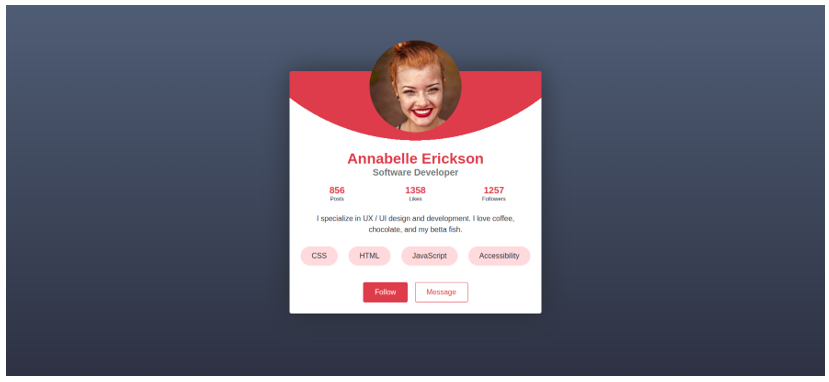
To create this layout, we will do a lot of work revolving around positioning, specifically leveraging flexbox to help us align and center elements. We will also look at how to make a rectangular image fit into a circle without distorting the image.
Let’s dive right in and take a look at our starting HTML (Listing 6.1) which can be found in the gitbub repo at https://github.com/michaelgearon/Tiny-CSS-Projects/tree/main/chapter-06.
We have a div with a class of card which contains all of the elements being presented in the profile card. To set our blog post information we use a description list.