2 Building a demo that puts you in 3D space
This chapter covers
- Understanding 3D coordinate space
- Putting a player in a scene
- Writing a script that moves objects
- Implementing FPS controls
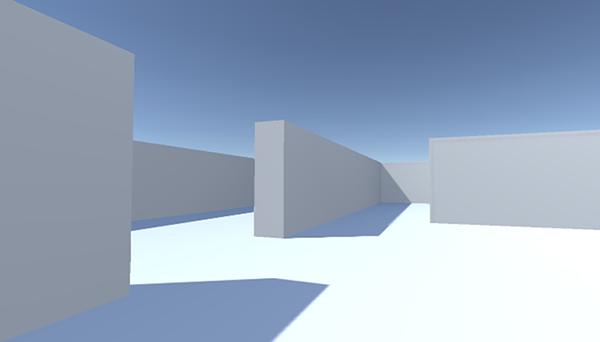
Chapter 1 concluded with the traditional “Hello World!” introduction to a new programming tool; now it’s time to dive into a nontrivial Unity project, a project with interactivity and graphics. You’ll put some objects into a scene and write code to enable a player to walk around that scene. Basically, it’ll be Doom without the monsters (something like what figure 2.1 depicts). The visual editor in Unity enables new users to start assembling a 3D prototype right away, without needing to write a lot of boilerplate code first (for things like initializing a 3D view or establishing a rendering loop).
It’s tempting to immediately start building the scene in Unity, especially with such a simple (in concept!) project. But it’s always a good idea to pause at the beginning and plan out what you’re going to do, and this is especially important right now because you’re new to the process.
Figure 2.1 Screenshot of the 3D demo (basically, Doom without the monsters)
NOTE
Remember, the project for this (and all chapters) can be downloaded from the book’s website. Open the project in Unity, then open Scene to run it. While you’re learning, I recommend you type out all the code yourself and only use the downloaded sample for reference. The website’s address is www.manning.com/books/unity-in-action-second-edition.