7 Putting a GUI onto a game


This chapter covers

  • Comparing old and newer GUI systems
  • Creating a canvas for the interface
  • Positioning UI elements by using anchor points
  • Adding interactivity to the UI (buttons, sliders, and so on)
  • Broadcasting and listening for events from the UI

In this chapter, you’ll build a 2D interface display for a 3D game. So far, we’ve focused on the virtual scene itself while building a first-person demo. But every game needs abstract interaction and information displays in addition to the virtual scene the gameplay takes place in. This is true for all games, whether they’re 2D or 3D, first-person shooters or puzzle games. So, while the techniques in this chapter will be used on a 3D game, they apply to 2D games as well.

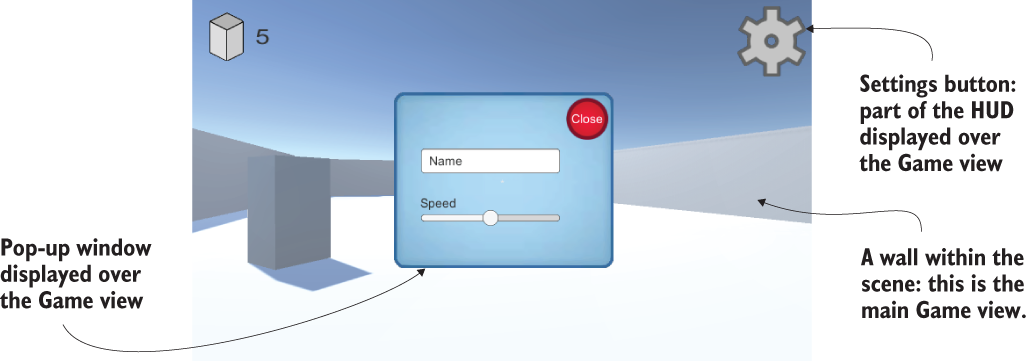
These abstract interaction displays are referred to as the UI, or more specifically, the GUI. GUI (short for Graphical User Interface) refers to the visual part of the interface, such as text and buttons (see figure 7.1). Technically, the UI includes nongraphical controls, such as the keyboard or game pad, but people tend to be referring to the graphical parts when they say “user interface.”

Figure 7.1 The GUI you’ll create for a game
CH07_F01_Hocking3

7.1 Before you start writing code . . .

7.1.1 Immediate mode GUI or advanced 2D interface?

7.1.2 Planning the layout

7.1.3 Importing UI images

7.2 Setting up the GUI display

7.2.1 Creating a canvas for the interface

7.2.2 Buttons, images, and text labels

7.2.3 Controlling the position of UI elements

7.3 Programming interactivity in the UI

7.3.1 Programming an invisible UIController

7.3.2 Creating a pop-up window

7.3.3 Setting values using sliders and input fields

7.4 Updating the game by responding to events