concept auto layout in category ios
appears as: uto layout, Auto layout

This is an excerpt from Manning's book iOS Development with Swift.
Table 1.5. Storyboard elements
Element
Description
View controller Manager for a scene’s views. View Visual components of your interface. Safe area An area of the root view that you can be confident is not obstructed by special views such as navigation bars. You can use safe area layout guides to help you lay out your views. (More on the safe area when we discuss auto layout in chapter 5.) Constraint Rules that define the layout of the views in a scene. (We’ll discuss constraints more in chapter 5, too.) Gesture recognizers Helpers that detect common gestures. (We’ll come back to these when we discuss user interaction in chapter 4.) First responder A first responder is the view in your scene that will be the first to receive any app events. Tapping on a text field, for example, will make it first responder. Use the first responder icon in Interface Builder to connect an action from a control to an action on the current first responder. Exit Customize behavior when exiting a scene. We’ll explore this further when we learn about navigation in chapter 9. Storyboard entry point Indicates the initial scene for the storyboard.
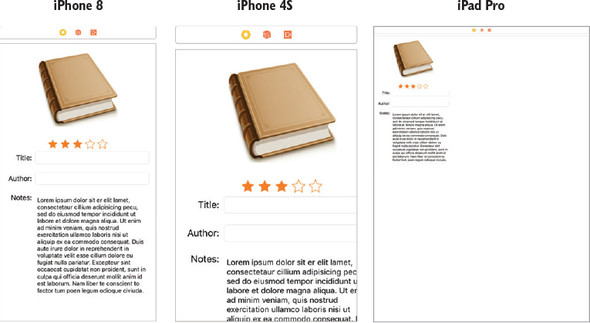
Auto layout is great for adjusting a layout based on constraints, but sometimes a layout requires more-significant adjustments based on the device type, screen size, or orientation.
Let’s be honest, auto layout and constraints can be a pain to deal with sometimes. Setting up rules to describe the frame of each element in the app can be time consuming, and making a small change to a layout can be frustrating.
Override the touchesBegan method in the Rating class. Determine the index of the star view the user touched from the stars array, and use this index to set the rating property. override func touchesBegan(_ touches: Set<UITouch>, with event: UIEvent?) { guard let touch = touches.first else {return} 1 guard let star = touch.view as? Star else {return} 2 guard let starIndex = stars.index(of: star) else {return} 3 rating = Double(starIndex) + 1 4 }Because the rating property calls setNeedsDisplay in its didSet property observer, setting the rating property is all that’s needed for the star-rating view to update visually when the user selects a different rating. For auto layout and scroll views to manage the size of the star-rating view correctly, you’ll need to specify its intrinsic content size.
- 1 Gets touch object
- 2 Gets star view touched
- 3 Gets index of star
- 4 Sets rating