Chapter 2. Building a GWT application: saying “Hello World!”
This chapter covers
- Understanding GWT terminology
- Using the Google Plugin for Eclipse
- Running an application in development mode
- Compiling an application for production
- Exploring common debugging techniques
Following directly from chapter 1, we’ll now put the development tools and plug-ins you installed to use. In the next two chapters you’ll create and run the GWT application shown in the mock-up in figure 2.1.
Figure 2.1. A mock-up of the application you’ll build in chapters 2 and 3. In this chapter you create the base application using GWT tools, and in chapter 3 you extend it to implement this mock-up.
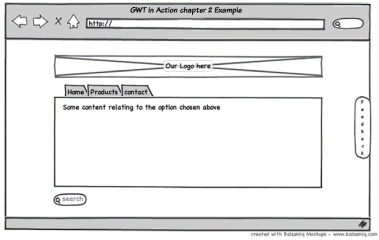
Figure 2.1 shows a fairly simple application with a logo, a tabbed panel with some content, a search button, and a slide-in feedback tab. Although simple, it’s typical of a common web application, and it will allow you to see the use of widgets, panels, events, styling, adding items to the browser page, and managing history (clicking the browser’s Back and Forward buttons) in action. Don’t worry if those terms mean nothing to you now; by the end of chapter 3 it will all be second nature.
We’ll also show how a typical GWT application is developed in two steps:
1. Use some tools to create a basic framework GWT application.
2. Enhance the framework GWT application to become the application you want.