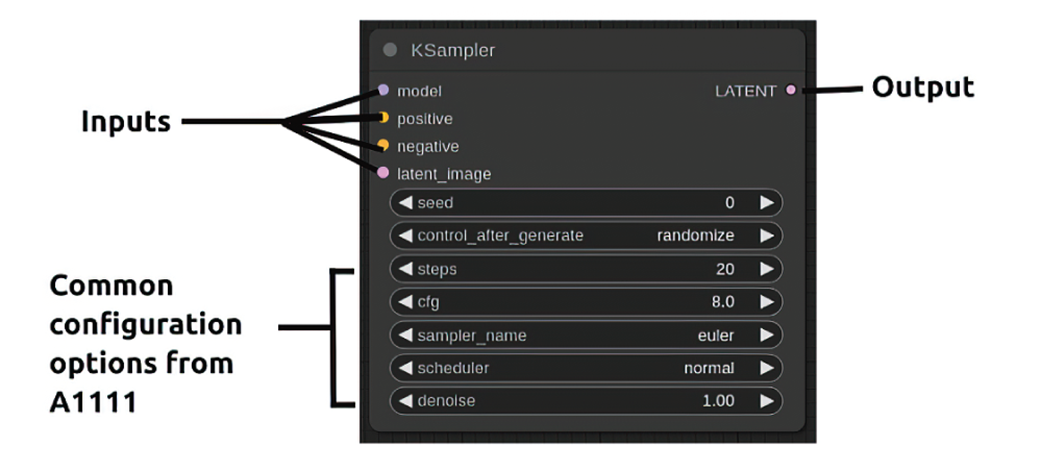
KSampler is the practical starting point for a ComfyUI workflow: add it to the canvas, then feed it the pieces needed to sample an image. Its colored connectors make the job visible—inputs arrive on the left, and the sampled result leaves on the right. section 8.2.1
A KSampler needs four inputs before it can run:
- model — connect the MODEL output from a Load Checkpoint node. section 8.2.2
- positive and negative — provide the workflow's positive and negative conditioning. section 8.2.1
- latent_image — provide the latent image that the sampler will process. section 8.2.1
To add one, right-click the canvas and choose Add Node > sampling > KSampler. For the model, add Add Node > Loaders > Load Checkpoint, choose a checkpoint from models/checkpoints, and drag its MODEL connector to KSampler's model input. ComfyUI blocks incompatible connections and can suggest suitable nodes when you drag from an empty connector. section 8.2.1 section 8.2.2
Reuse KSampler for a hi-res pass
A second sampling stage can extend the workflow rather than forcing a fresh build. Copy and paste the existing KSampler, VAE Decode, and Save Image nodes; ComfyUI preserves connections among the selected nodes. Rewire the copied KSampler's latent_image input to the Upscale Latent By output, keep the shared VAE connection, and change the second Save Image filename_prefix to hires. The workflow then saves both the original and hi-res results for comparison. section 8.3.2
Figure 8.5 ComfyUI allows us to build workflows by connecting components.
Use the workflow figure to inspect how KSampler fits into a connected ComfyUI graph. section 8.2.1