MySQL
Overview
MySQL is a free, lightweight, and easy-to-install database management system (DBMS) that is widely used for tutorials and examples due to its accessibility and ease of use across different operating systems. It is a popular choice for developers and educators alike, providing a robust platform for managing databases without the complexity of more heavyweight systems.
Installation
To install MySQL, you need to download the installer from the official MySQL website, selecting the version that corresponds to your operating system. The installation process is guided by an installation guide available on the MySQL documentation site. During the installation, you will be required to create an account and set up credentials, which are essential for accessing the database later.
Using MySQL Workbench
MySQL Workbench is a visual tool used for working with MySQL databases. It allows users to manage database connections, execute SQL queries, and perform various administrative tasks.
Adding a New Connection
-
Open MySQL Workbench: Once you have MySQL Workbench open, you can add a new connection by clicking the plus icon near the "MySQL Connections" label, as shown in Figure E.1.
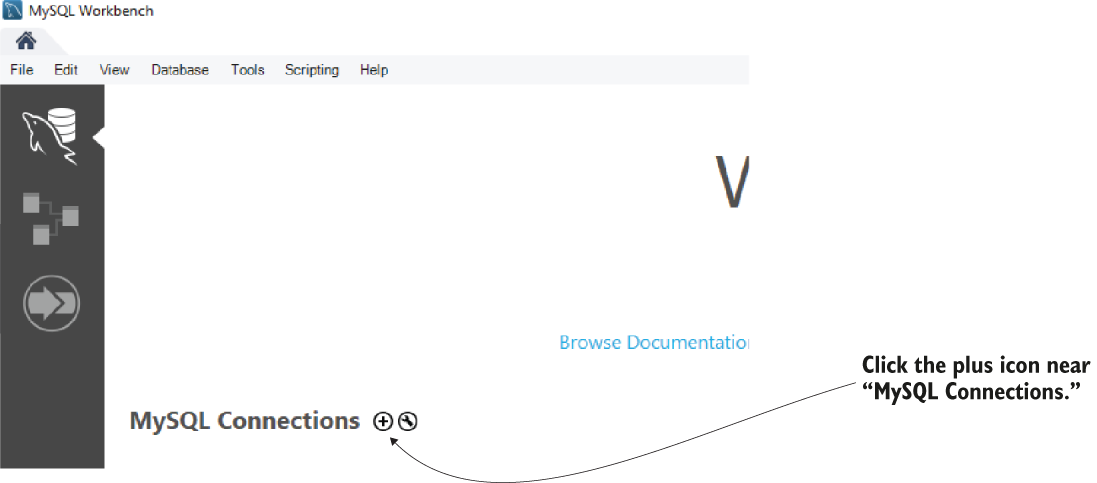 Figure E.1 Once you open MySQL Workbench, click on the plus icon near the label “MySQL Connections” to add a new connection.
-
Configure the Connection: A popup window will appear where you need to name the connection and enter the credentials you set up during the DBMS installation. This step is illustrated in Figure E.2.
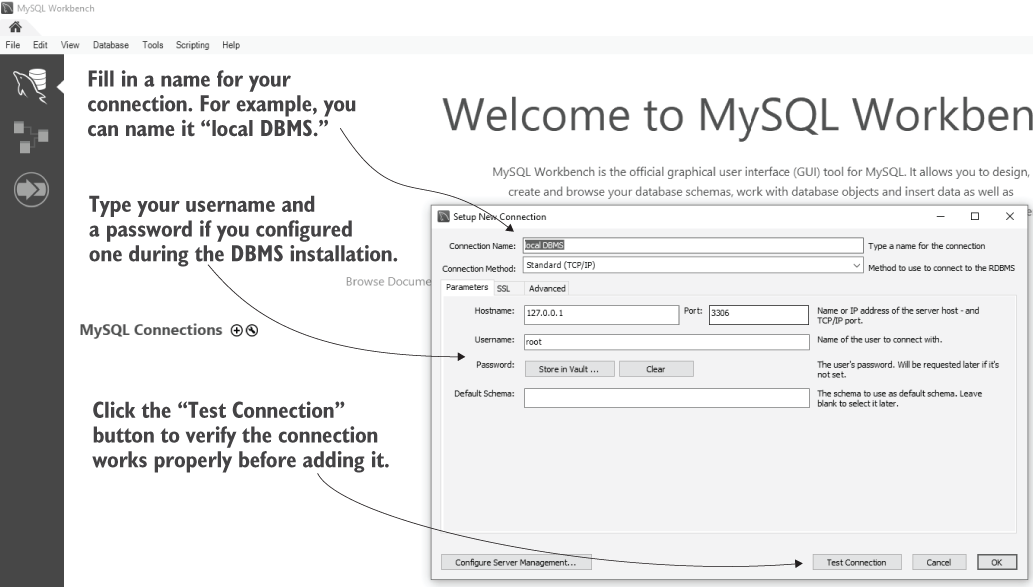 Figure E.2 Give the connection a name and fill in the credentials you configured when installing the DBMS. Then, click on the “Test Connection” button to verify that MySQL Workbench can connect to the database.
-
Handle Warnings: In some cases, MySQL Workbench may display a warning message. This warning does not affect the implementation of examples, so you can safely click the "Continue Anyway" button, as shown in Figure E.3.
 Figure E.3 Sometimes MySQL Workbench displays a warning message. This warning won’t affect the way you implement the examples in the book. You can click on the “Continue Anyway” button if such a message is displayed.
-
Verify Connection: If the connection details are correct, MySQL Workbench will display a "Successfully made the MySQL connection" message in a popup dialog, as depicted in Figure E.4.
 Figure E.4 If MySQL Workbench connected to the local DBMS, it displays a “Successfully made the MySQL connection” message in a popup dialog.
-
Finalize Connection: After clicking the OK button, the new connection will be added to the MySQL Workbench home screen, appearing as a rectangle with the name you assigned, as shown in Figure E.5.
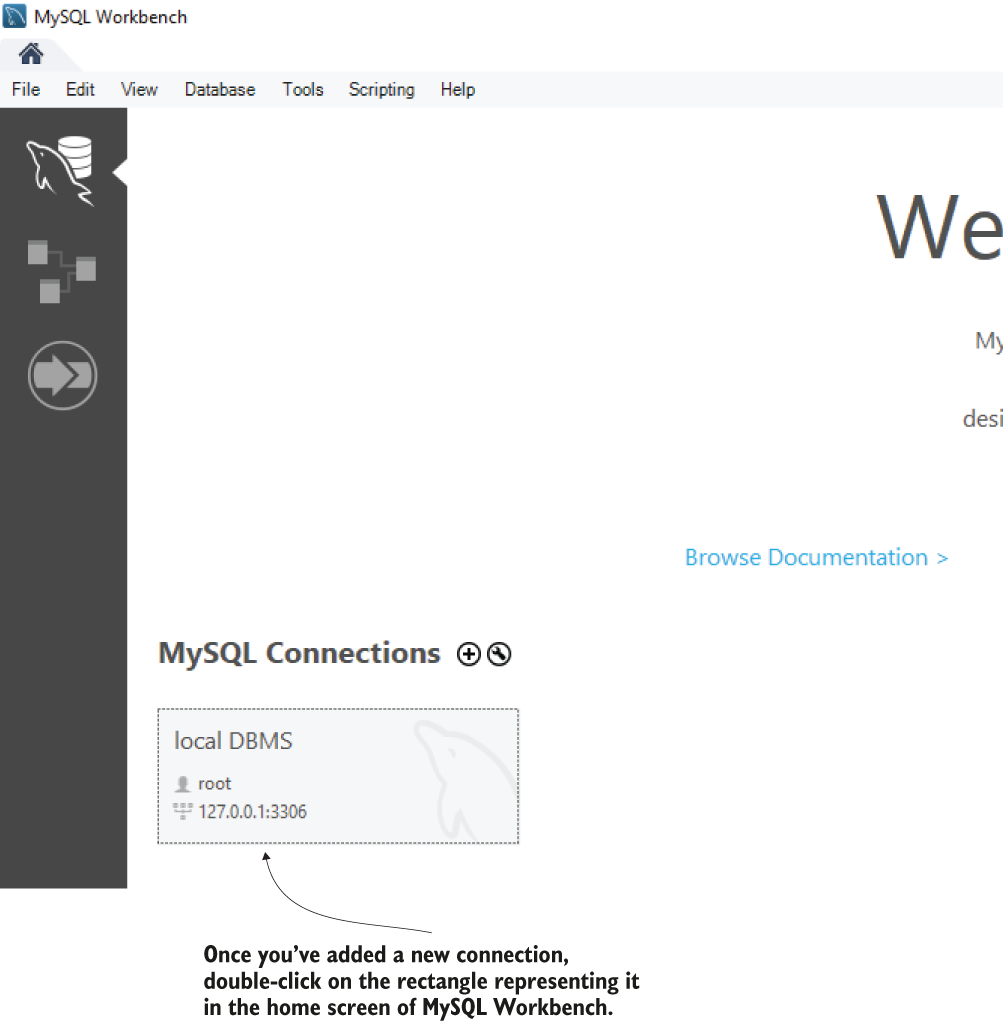 Figure E.5 In the MySQL Workbench main screen, you can now see the connection you added. The connection is displayed as a gray rectangle, and it has the connection’s name.
FAQ (Frequently asked questions)
Why is MySQL commonly used in tutorials and examples?
What message does MySQL Workbench display when it successfully connects to the local DBMS?
How do you install MySQL?
What might you need to do during the MySQL installation process?