Chapter 3. Coding in Objective-C
This chapter covers
- Creating classes to match your designs
- Declaring and implementing messages and properties
- Connecting code to views in Interface Builder
In the last chapter, you learned how to go from ideas to object-oriented designs. In this chapter, you’ll learn how to code those designs. By iteratively applying the concepts of sketching, designing, and coding, you’ll eventually have an app.

To finish an app, you’ll go through this loop many times, refining it on each pass. You already know how to create designs by sending messages to classes that are organized into models, views, and controllers, so you’re halfway there.
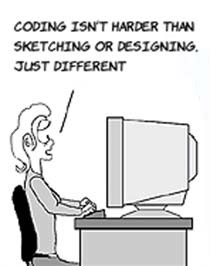
Representing those designs as code is the most exacting of the three skills you need to create an app. Your notebook won’t complain if it doesn’t like your sketch or design, but Xcode will put up error after error if you don’t get the syntax exactly right. In reading this chapter, pay attention to every detail about creating classes, messages, and properties.
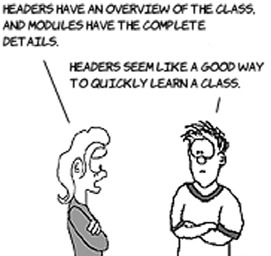
In your designs, you spent a lot of time thinking about what the classes should be, what properties they should have, and what messages they need to respond to and send. You’ve also learned that classes can be in different kinds of relationships with each other. In Objective-C, you’ll see each piece of the class in two places, the header and the module, which together define the parts of a class.
You can start learning how to code each part by looking at the classes Xcode generated for you in the “Hello World” app. Open Xcode, and click HWViewController.h. It looks like this:
#import <UIKit/UIKit.h>
@interface HWViewController : UIViewController {
}
@end
The #import statement indicates a relationship, in this case to the iPhone UI classes. In your diagrams, wherever you’ve drawn an arrow from one class to another, you’ll need to use an import to let Xcode know that one class relies on the information in another.
The @interface line is where you put the name of the class and list any is-a relationships you’re in. In iPhone programming, all view-controller classes need to inherit from UIViewController. So, your class will automatically respond to all of the messages in a UIViewController, which means you can concentrate on how yours is different.
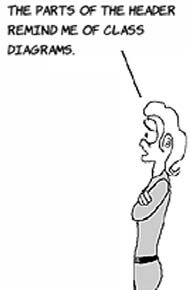
The interface of the class is defined between the @interface and @end statements. You put the class’s properties (which include the other classes this one has) between the curly braces, and you put the messages after the closing curly brace and before the @end. Remember, the interface is like a table of contents. You just need to list the messages here, not say how they work.

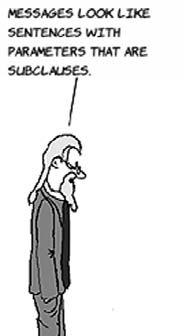
Before you can fill out the header, you need to learn how to code messages. Objective-C, like most programming languages, requires that you get each character you type in exactly right. Before you fully understand the syntax, it may seem like a random collection of letters and punctuation, but you need to make sure you copy it into Xcode exactly as you see it.
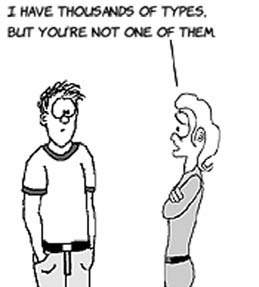
When you list a message in the header, that’s called declaring it. To declare a message, you need to know its name, its parameters, the types of the parameters, and the type it returns. Many types are available. To start with, each class you make can be used as a type, and the iPhone comes with thousands of classes you can use; there are also built-in types for simple things like numbers and yes/no values. Some of the most common are shown in this table.
Table 3.1. Common classes and built-in types
| Type |
Description |
|---|---|
| NSString* | Text values like @"Hello" and @"Good-bye" |
| NSDate* | Dates like July 4, 1776 |
| int | Positive and negative integer numbers, like -1, 0, and 5 |
| bool | YES or NO |
| double | Positive and negative decimal numbers like 3.14159, 0.0, and -123.45 |
| void | Message return values that indicate there isn’t a return value |
| NSMutableArray* | A collection of any number of other objects, such as a list of strings or dates |
| UIButton* | A button on a view |
| UILabel* | A label, like the one you used in the Hello World! app |
Here are some ways a message can look in your header. The simplest is a message without any parameters or a return. You use it to tell an object to do something it knows how to do without any more information, and you don’t want anything back from the message.


Here’s an example of a message that returns an int (an integer number).

Here’s an example of a message that returns an int and takes a text parameter using the type NSString*. Anything of type NSString* is called a string.

Finally, you can have a multiple-parameter message. In this case, the name of the message is split up so that parts of it can be associated with the role of the parameter within the message. Here’s what it looks like:

Your actual messages will have more descriptive names for both the message and its parameters. Let’s try some examples. Think of a name for the message, what it should return, and any parameters it takes. For types, let’s use int or double for numbers, bool for yes/no values, NSString* for text strings, NSDate* for dates, NSMutableArray* for lists, and void if you don’t need a return value.
Table 3.2. Declare these messages
| Message description |
Declaration |
|---|---|
| 1. A message that returns the first name of a person object as a string | |
| 2. A message that returns how old someone is, given a birth date | |
| 3. A message that takes the name of a parent and returns a list of their children | |
| 4. A message that takes a string and returns the number of letters in it | |
| 5. A message that takes a number and returns whether it’s positive or not | |
| 6. A message that takes two yes/no values and returns yes only if the values match each other, and no otherwise | |
| 7. A message that takes a number and returns the date that is that number of days in the future | |
| 8. A message that takes two strings a state, and a capital, and returns yes if the capital is the capital of that state | |
| 9. A message that takes a first name and a last name and returns a string with them separated by a space | |
| 10. A message that takes a string and shows an alert containing the string |
At this point, you should be working on getting the syntax of the message declaration correct. You don’t need to match these choices of names exactly or care whether you used an int or double if the choice was arbitrary. Here’s a possible set of correct answers:
- -(NSString*) getFirstName;
- -(double) getAge: (NSDate*)birthdate;
- -(NSMutableArray*) getChildrenOfParent: (NSString*)parent;
- -(int) getNumLetters: (NSString*)string;
- -(bool) isPositive: (int)number;
- -(bool) doesBool: (bool)a matchBool:(bool)b;
- -(NSDate*) getFutureDate: (int)days;
- -(bool) isCapital:(NSString*)capital ofState:(NSString*)state;
- -(NSString*) getFullNameFromFirstName: (NSString*)firstName lastName: (NSString*)lastName;
- -(void) showAlert:(NSString*) text;
Although the names and exact types might be arbitrary, the minus signs, stars, parentheses, and semicolons aren’t. If you get this wrong, Xcode will let you know with fairly cryptic error messages. You have to get good at writing the syntax exactly or noticing when it’s not right.

Now that you’ve had practice with declaring messages, it’s just a small jump from here to writing messages for view controllers that Interface Builder can attach to views. We’ll cover that next.
As you saw in the previous chapter, in model-view-controller (MVC) applications, views need to send messages to controllers whenever the user does something with the app. In iPhone programming, because you you use Interface Builder to draw views and don’t write any code, there isn’t a place to put the code to send a message. Instead, you create special messages in the view controller called actions, and Interface Builder lets you attach them to views.
Actions must take one parameter called sender with type id, which represents the view that caused the message to be sent. Actions don’t return anything, but Interface Builder want us to use IBAction as the return type instead of void. Here’s what an action message declaration looks like:
-(IBAction) actionMessage: (id)sender;
Messages are the main building block of classes. In your apps, you’ll be spending a lot of time defining them, sending them, and processing their results. But they aren’t enough. Next, you’ll see how objects remember things between messages.
So far, we’ve concentrated on messages, but objects also need to carry around data with them to keep track of where you are in your app. Additionally, all those has-a relationships we talked about must be remembered, and you can use properties for those as well.
A property consists of a type, a name, and two messages to get and set its value. This combination is so common that Objective-C provides some shortcuts to help you make them quickly. The first step is to declare the field in your header file to set the type and name of the property. This is put between the two curly braces:

To have Objective-C create the two messages for you, you need to use @property. It’s used in the messages section of the header, and it looks a lot like the field declaration you just saw:

You’re only going to use two options. The first one is either strong (which is the same as retain) or weak. These terms let Objective-C’s Automated Reference Counting (ARC) know how it should manage memory for you. You only need to use the strong option if you create the property manually and the property is using a class for its type (using a class name and star). If the propriety is automatically created by Xcode, then the option will most likely be weak. The second option, nonatomic, says that you aren’t accessing this property from multiple threads (which you aren’t, because you don’t know how).

If you want to use a piece of a view in a view controller, you use an outlet property. To declare the outlet, you use this:

So far, you’ve broken down apps into classes; organized classes into models, views, and controllers; and learned that classes are made up of properties and messages. The next steps are to learn how to define the messages to say what they do and to get the various objects to communicate with each other. The easiest connections are between the views and view controllers, because if you use outlets and actions, Interface Builder can help us connect them with a GUI. You’ll see how to do that in the next section.
You draw views in Interface Builder and write code in the text editor. As you’ve seen, there are special messages called actions and special properties called outlets that connect views and controllers. Views send actions to controllers when they’re touched, and controllers can access and change views through their outlet properties.
To see this better, let’s make the Hello World! app a little more interactive. Instead of saying hello to the entire world, let’s have it ask for your name and then say hello to just you. It will look like this:


The first thing to do is identify all the parts of the view:

Next, you need to figure out which parts of the view will be changed or accessed by the controller. These are your outlets:
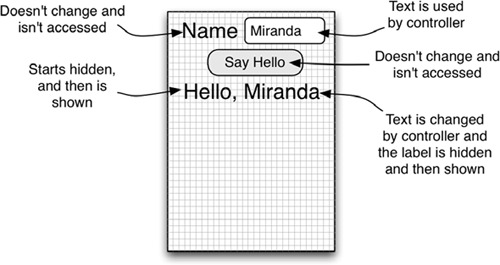
Each part of the view that can change will use a GUI to create outlets.

The last step before you code is to list any actions. In this example, the only action is to Say Hello when the button is touched.
Now you’re ready to draw the view to match your sketch. You already labeled each part, so it will be easy to go into Interface Builder and draw what you need.
To get started, click HWViewController.xib in Xcode to bring up the Interface Builder editor. In chapter 1, you put a label there that said Hello, World!; you should change that to just Hello and resize it so the text fits exactly in it. You need another label that says Name, a text field next to it, a button that says Say Hello, and a label that says User Name (until you change it). You can find these pieces in the Object Library. When you’re done, the view will look like this:

Remember that you change the text of a label or button by double-clicking it and typing a new value. You can click and drag the parts of the view to position them and use the grab handles at their corners to resize them. You want the Hello and User Name labels to start out hidden, so click each one and then check the Hidden field in the Attributes Inspector. Interface Builder will show these labels grayed out rather than hidden so they’re easy to work with. When you run the app, they will be hidden.

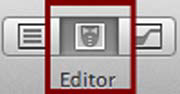
Xcode provides an assistant that allows you to create outlets and actions using the Interface Builder GUI. It’s nowhere near as helpful as Alfred the butler, but the Xcode assistant does save a lot of typing. To display the assistant, click the button in the toolbar that looks like a butler’s tuxedo.
When you’re viewing a .xib file, the assistant will display the associated header file. So, because you’re viewing HWViewController.xib, the assistant is displaying HWViewController.h. To create an outlet for the User Name text field, Control-click the text field and drag the mouse into the assistant between the beginning and end of the interface declaration:

When you release the mouse button, a dialog will pop up with settings for the outlet. Leave the default settings, but set the outlet name to userNameTextField and then click Connect.

Presto, Xcode declares a properly typed IBOutlet property and automatically connects it to the text field. Repeat the process for the User Name label and the Hello label, and name the outlets helloLabel and userNameLabel. When you’re done, you should have the following three definitions after @interface but before @end:
@property (weak, nonatomic) IBOutlet UITextField *userNameTextField;
@property (weak, nonatomic) IBOutlet UILabel *userNameLabel;
@property (weak, nonatomic) IBOutlet UILabel *helloLabel;
And because you’re using ARC, you don’t have to do anything special to release them.

Finally, you need to declare and define the sayHello action. Remember, actions always return IBAction and take a parameter of type id called sender. You can create IBActions the same way you created your IBOutlets using the assistant. Control-click the Say Hello button, and drag the mouse over to HWViewController’s interface declaration:

This time you need to change the connection type from Outlet to Action. Name the action sayHello:

-(IBAction) sayHello: (id)sender;
And in your module, the assistant automagically adds this empty message body, which you’ll fill in later:
-(IBAction) sayHello: (id)sender
{
}
Your project can now be built, so press Cmd-B or use the Product > Build menu to build. You should have zero errors and zero warnings.
If you’ve made a mistake, you can always delete a property or action. If you delete an action, be sure to delete both the declaration in the header and the definition in the module.
With your connections in place, it’s time to save and start coding. The only thing holding back your app from saying hello to you is that you never filled in the sayHello message in your module. You’ll do that next.
Coding messages can get complex. As you see more of them, you’ll learn the tools that you need to make them. This message is simple, but it gives you a chance to see how to access outlets and their properties.
You want the sayHello message to do three things:

- Set the text property of the User Name label to the text property of the text field.
- Set the hidden property of the Hello label to NO.
- Set the hidden property of the User Name label to NO.
All you’re doing is accessing and changing some properties. The syntax for accessing a property of an object is

And because properties themselves are often objects with properties, you can chain together the dots and access the property of a property like this:

You change a property by using an equals sign and providing an object of the correct type, and you access an object’s own properties by using a special predefined object name called self. To see all this in action, here’s the final code for the sayHello message.
-(IBAction) sayHello: (id)sender
{
    self.userNameLabel.text = self.userNameTextField.text;
    self.helloLabel.hidden = NO;
    self.userNameLabel.hidden = NO;
}
Replace the code in HWViewController.m with this code, and you’re done! To see the app, build and run the final result in the simulator with Cmd-R. When you type your name in the text field and touch the button, the app should say hello to you.

Of course, real apps need to do a lot more than copy properties around or set them to constant values. You need to take the values in outlets, send them to models, and get back results that you then use to change the view in various ways. In those messages, you might need to make decisions, do calculations, or access databases or the web. The bulk of iPhone app writing is defining these messages.
Over the course of the next part of the book, you’ll build a few real-world apps that use different features of the iPhone. Each message will not only help you get the app done, but will also show you a new feature of Objective-C or iOS.
Soon you’ll be seeing a full MVC application. You’ll implement it, enhance it, and modify it with your own data. In the end, you’ll have a unique app that you can put in the App Store.