concept name in category liferay

This is an excerpt from Manning's book Liferay in Action: The Official Guide to Liferay Portal Development.
You’re going to fill this page with applications so you can see how Liferay aggregates them. You can browse the applications by opening the categories to which they’re assigned. Or if you know the name of the application you’re looking for, you can search for it by using the search bar at the top of the Applications window. You can add an application to a specific column by dragging the application off the Applications window and dropping it into the appropriate column, as shown in figure 1.4. Let’s pick some cool applications to add to your page. To the left column, add Navigation, Activities, Dictionary, and Translator. To the right column, add Message Boards, Wiki, and Calendar. Note that in a real-world web site, you’d likely never put all of these on one page—you’re doing an experiment here to see the concept.
Creating portlet plugins with the Plugins SDK is easy. As noted before, there is a portlets folder inside the Plugins SDK folder. This is where your portlet projects will reside. To create a new portlet, first decide what its name will be. You need both a project name (without spaces) and a display name (which can have spaces). When you’ve decided on your portlet’s name, you’re ready to create the project.
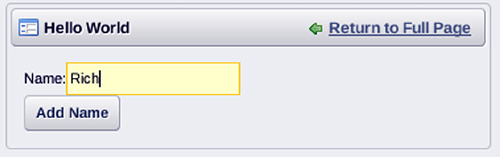
The functionality you’re going to add is in Edit mode. Users will enter their names (see figure 2.6), which will each be stored using the Portlet API as a portlet preference, similar to the way a Weather portlet developer would store a zip code in order to display the proper weather map. The portlet will then display each user’s name in the Hello message when that user logs in (see figure 2.7).
First, let’s change the name of the portlet. Open portlet.xml, which is in the WEB-INF folder. You need to change the name in two places in this file. The first takes effect at a system level, and the second takes effect for the portlet title.