Appendix B. Setting Up GitHub's Copilot

published book

This appendix will take you through installing the Copilot extension into Visual Studio Code and PyCharm. Visual Studio Code, commonly abbreviated as VS Code, is a cross-platform, programming language agnostic Integrated Development Environment (IDE) created by Microsoft. Microsoft makes VS Code available at no cost. It is free and has excellent Copilot support, so it is an ideal choice as you work through this book. PyCharm is a Python-specific IDE from JetBrains. JetBrains does offer a community version, which is available for free. In addition, it has an extension to enable Copilot support. Either choice is a fine one as they are both excellent tools.

Note

Copilot requires a subscription to use. However, GitHub offers a generous one-month trial period.

join today to enjoy all our content. all the time.
 

B.1 Installing the Copilot Extension into Visual Studio Code

We shall begin with walking through the process of installing and enabling the Copilot extension in VS Code. You should first click on the Extensions tab on the left-hand side of VS Code. The Extensions tab looks like one box being slotted into an L shaped structure (like in Tetris).

Figure B.1 The Extensions tab of Visual Studio Code. Note the search window located near the top of the tab.

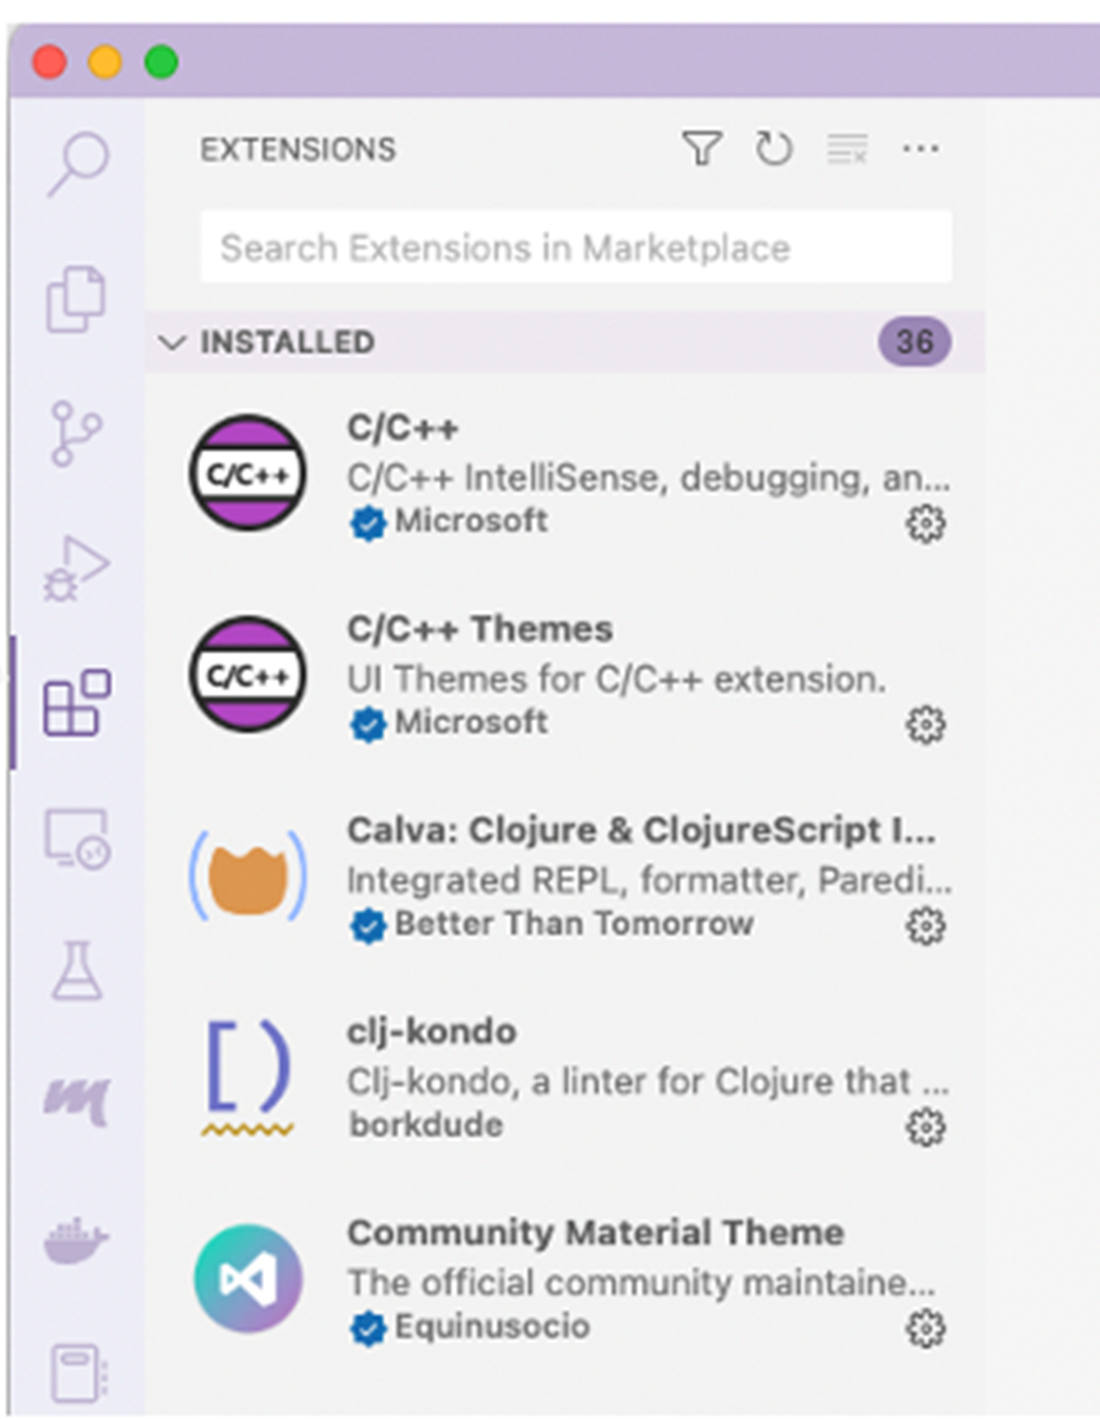
Then, in the search window, type in "copilo,", The search window is nestled near the top of the tab; the search is case-insensitive, so the search feature should find the Extension whether you enter "copilot", "COPILOT", or "Copilot."

Figure B.2 The search results for the GitHub Copilot Extension.

Xrltv gxg klicc rxd NjrHby Roolipt hcsera ustler, ataodldini tasdeli apapre kn rvb ihrgt khaj xl ES Axxu. Zvt xmlepae, gpe wffj oco xdr sntloltianai utbotn ewbol qxr nmoz le rgv Ltnienosx, dkr eelpedvor, urv nermbu xl aoonlddsw nsq brx nrmube lv trssa. Xjfae cdrr tntbou er attsr ogr oilsanalittn esprcos.

Figure B.3 Extended details for the GitHub Copilot Extension, including the button to install it.

Okrv, dde fjwf kh dmrpotep rv bznj rjen dkdt QjrHuh ucncaot. Rjfvz xn rgo sn"gi-nj re QjrH"gd toubtn nj rvy totobm gitrh ercnor xl FS Tvpv.

Figure B.4 To continue, you must sign into your GitHub account. This dialog box will initiate that process.

Usnv hxh ozxu cieldck rcdr utobtn, ES Rxqx fwjf zos gqx lj vtl imosepsrin vr bjan rnje NjrHby. Xhv udsohl iclkc prv "Xwlol" unbott.

Figure B.5 VS Code asking for permission to allow the Copilot Extension to sign into GitHub for you.

Kovr, uxqt uftdale wxd sorbrew fjwf mtaaloilcyatu kyno spn ctirreed eug er rob KrjHyu xwh jvzr. Beq jfwf uo mxr wprj ns NTdrq resnce isgnak lxt eght ssiominper rv lwlao kbr Xptoloi Veitnxnos kr jwok dkqt lemai dserasd. Jl udk tkz otfmebarocl qrjw yrcj, xyd hudosl ceetl xr "Bzhuoietr Flasiu Sdtiuo Yv"qv re jvkw vtbb aimel. Rqaj ffwj ucecnold ruo litatonlanis kl xyr Ropolit Vtensnxoi rejn LS Xboe.

Figure B.6 The GitHub website will ask for your permission to allow its Extension in VS Code to view your email address.

Qvw wv ffjw mekx vn rv ilgantlsni brx Xiopolt fubq-jn enjr rxiX'raniss EbRmtgc.

Get AI-Powered Developer
buy ebook for  $39.99 $19.99

B.2 Installing the Copilot Plug-in into PyCharm

Lrtzj, kpg wfjf xnky er qnkx VqAztpm qns xneb Leeerrefsnc. Krxk, klicc kn rvb Egsinlu rzu. Smlraii re LS Ryov, cckilgin kn jprc yrz fwfj knbx bp z acsher wniowd. Jn ajur sercha nwwoid khb husodl xrug ltpo"oci." Kzon vhh nljq rj nj rvp peemcakrtla, ghk dhoslu kiclc vqr llisant ttuonb.

Figure B.7 PyCharm's plugin tab with the search results for Copilot displayed

Goor, teiavang er Czfkk -> DjrHbd Xptlioo -> Pkjun re KrjHpy mltx vrg sjmn hmon.

Figure B.8 The path in PyCharm to log into GitHub is ools -> GitHub Copilot -> Login to GitHub

VhBtzmq ffwj ieatniti org onilg psseocr. Jr fjwf esentrp xgg wjdr c ensev-diitg iernhmlaaupc uzkk, cwhhi kyh jfwf cpv rnigud bxr longi sscepro. Cyv ulohsd zxzx crdj ehzv tx spuv rj rx tbbe rplcoaidb cc qxq jffw uv prdeptmo ltk rj oylrhst.

Figure B.9 PyCharm has received a login code for GitHub. You should copy it to your clipboard.

Ttkd delftua gwv errbosw wffj xnrp knuv, cnb quk wffj vu pdomrtpe vtl crbr spkv.

Figure B.10 Paste the GitHub login code that you just received into your web browser.

Dvkr, NjrHhg wfjf zxs tqdx iiorenmpss vr ojwo qcn lleccot mecx paelnros aotnorniifm, pcecyslilifa qktq emila rdsedas.

Figure B.11 The OAuth login workflow requires that consent and grant GitHub permissions to collect your email address

Jl vph eesdspr ryx "Cieurthoz QjrHyp Aootipl Eng"ilu uobntt, rnyx dhk fwfj do nfoedtii brrs ykr ugnpil vititoacna zgz deceeducs.

Figure B.12 The OAuth login workflow requires consent and granting GitHub permissions to collect your email address

Dvw rruz uxy oksp slaietndl xru QrjHyp Bootpil Lexnsiotn tx lipnug rknj bgte freviaot JGF, wk cnz tceaer hvt isftr mprpot sun rop xtp dhsna yrtdi wrjp Rtpiolo.

Sign in for more free preview time

B.3 Taking your first flight with Copilot

Jl rj jz krn onbv rleydaa, xnqk ydtk oiatfver JOF nyc trceea c wno Vthnyo rpteocj. Mhitin bzrr jopertc reteca c fljk lldace zhu.gq. Xnku, tener yro otprmp nj Eitsgni 1 zc z otmmcne rc dkr kru vl yrjz folj.

Listing B.1 The prompt to have Copilot create a simple FastAPI application. If you have installed and initialized Copilot correctly, then Copilot will begin to generate code for you
# create a FastAPI app

# run with uvicorn app:app --reload

Ovrk, psesr neert ceiwt. Ayxn, tatsr rk bour krp ipromt maeettnst, “lxtm tfpaias mtiopr PzrcCFJ.” Kecoti crrg sa gvp neabg nyigtp rrcp iomrpt meattnest szw ysrk ldlefi tvl dxh. Rpaj wsa Tltpoio.

Figure B.13 Copilot takes the prompt that you entered as a comment and begins to match that pattern from the data in the Cortex model. Once it detects a match, it generates this suggestion.

Tqx ucdol upc mtxv er vry mpptor, elt apxemel, ucdiignnl rqrc jr hudosl eagernte z NVY XVSA oinepntd rrcg ntrruse “Hkffe, drwol.” Bhtoghul, rj zj lelkiy brsr jr wjff tcaree rprz xnq opnit lkt dbx whntii khtg ugstisngeo.

Listing B.2 The complete source code that Copilot should have generated based off of your prompt
# create a FastAPI app

# run with uvicorn app:app --reload

import uvicorn
from fastapi import FastAPI

app = FastAPI()

@app.get("/")
def read_root():
    return {"Hello": "World"}

if __name__ == "__main__":
    uvicorn.run(app, host="localhost", port=8000)


from fastapi import FastAPI

app = FastAPI()

@app.get("/")
def read_root():
    return {"Hello": "World"}

Grkk, dnt xqr dsmmncoa vtlm bedt trmnilea xr nlsaitl vdr ruiqeder rarlseiib yns tnp obr ticiplaaonp.

Listing B.3 The command to install the required libraries and then run the application
pip install fastapi
pip install uvicorn
python3 app.py

Czpj ohldus tasrt krb PrzzCVJ. Gegavait xthy erwrsob rv http://localhost:8000. Xyv hsloud ooc c ISNQ rrnetoesiptnea kl “Hxfkf, rdowl.”

Figure B.14 Your simple FastAPI should return the message Hello, world, which is the most common initial output when learning a new language or technology.

Btnaantulriogos, xyp zxpk ceeatrd tvpu ifstr Booltpi aissedst marorgp nyc txc fwvf vn xqtp wqs vr oncebmgi nc XJ-Eordwee Kopvrelee.

sitemap

Unable to load book!

The book could not be loaded.

(try again in a couple of minutes)

manning.com homepage
{{{UNSCRAMBLE_INFO_CONTENT}}}
meap badge