Upsampling turns a low-resolution generation into a larger image, but it is not a photocopier with a pixel obsession. In Stable Diffusion, hi-res upscaling can preserve the original scene or use further denoising and generation to alter its details. Start with a manageable low-resolution image, then enlarge it for a display, print, or other target size. section 7.1.3 section 7.4
Choose the scale before tuning the look:
- Use “Upscale by” to enlarge by a multiplier while keeping the aspect ratio. A 4x scale takes an 856×360 image to roughly 3424×1440. section 7.2.1
- Use “Resize to” when an exact output resolution matters, accepting that it may change the aspect ratio slightly. section 7.2.1
- Treat 2x and 4x as creative settings, not merely size settings: larger factors can noticeably change or even distort scene details. section 7.2.1
- Begin with latent upscaling in Hires. fix; use R-ESRGAN variants where their photorealistic or anime-oriented results fit the image. section 7.5
Hi-res steps control how much work happens during the enlargement pass. In A1111, a setting of 0 means reuse the original generation’s step count, which is a sensible default for a larger version of the same image. Lowering the original sampling steps and assigning more hi-res steps instead lets the upscaler finish an intentionally sparse image, often producing a visibly different result. section 7.2.3
Let the second pass finish the scene
Generate a low-resolution sci-fi space battle at 856×360, then upscale it 4x for a wide wallpaper. For a more transformative pass, generate the starting image with 5 sampling steps and run 4x hi-res upscaling with 10 steps; the result can add detail while changing the original composition. section 7.1.3 section 7.2.3
If the enlarged image drifts too far from the source, tune Denoising Strength. For deeper control, image-to-image upscaling behaves like regular text-to-image generation: prompts, sampling settings, and checkpoints can all be changed. Switching checkpoints can deliberately move the result toward a new visual style, although repeated manual A1111 runs become tedious when exploring many variations. section 7.5 section 8.1.1
Figure 7.12 Letting the upscaler do most of the work for our image generation.
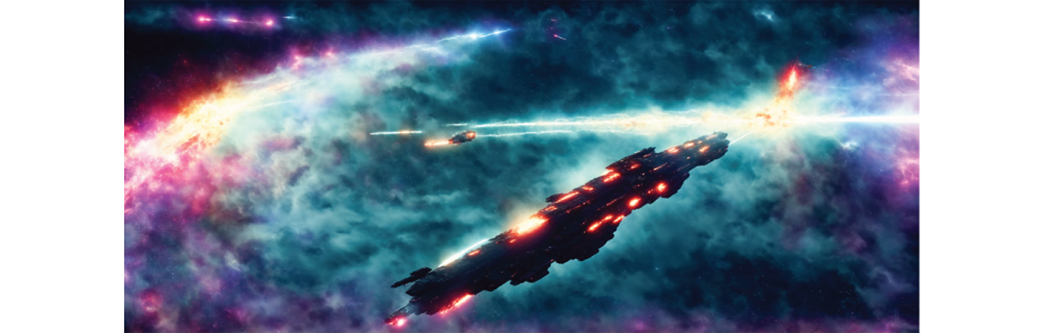
Compare an intentionally under-detailed source with the result after the upscaler performs most of the generation work. section 7.2.3